Symposium Zoom Set Up
Please follow the following steps to complete the set up for your team’s Symposium Zoom Meeting
-
Go to purdue-edu.zoom.us/ and login with your 2-factor authentication (Purdue Login on Duo Mobile)
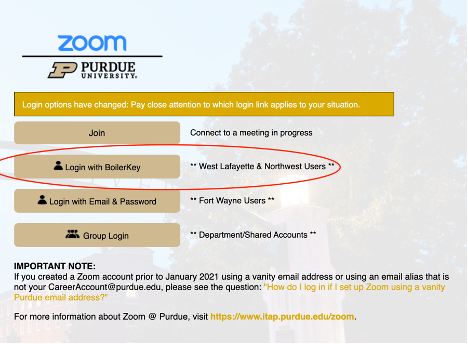 Figure 1. Zoom 2-factor authentication Purdue Login
 -
Go to “Meetings” on the left-hand menu. Click on “Schedule a meeting”.
 Figure 2. Schedule A Meeting
 -
Fill out the meeting information as below (see screenshot below):
-
Topic: Use your team name followed by DM CRP Symposium (ex. Merck – DM CRP Symposium)
-
When: Wednesday, April 20, 2022. Select start time to be 2:00 PM ET so it is ready to start the Zoom room early. The Symposium will officially start at 2:30 PM ET.
-
Duration: Select 3 hours (2:00 PM – 5:00 PM ET to allow flexibility even though it should last from 2:30-4:30 PM).
-
Meeting ID: Select “Generate Automatically” to add additional layer of security. Do not select personal meeting room.
-
Security: Enable the passcode.
-
Meeting Options: Allow participants to join before start time. Also select “mute participants upon entry” since people will be joining at any time between 2:30-4:30 PM so we don’t want them to interrupt the conversation.
-
Alternative Hosts: Add a student on your team as a secondary host option in case of technical difficulties on the day of the symposium. Enter their email to add them as a secondary host.
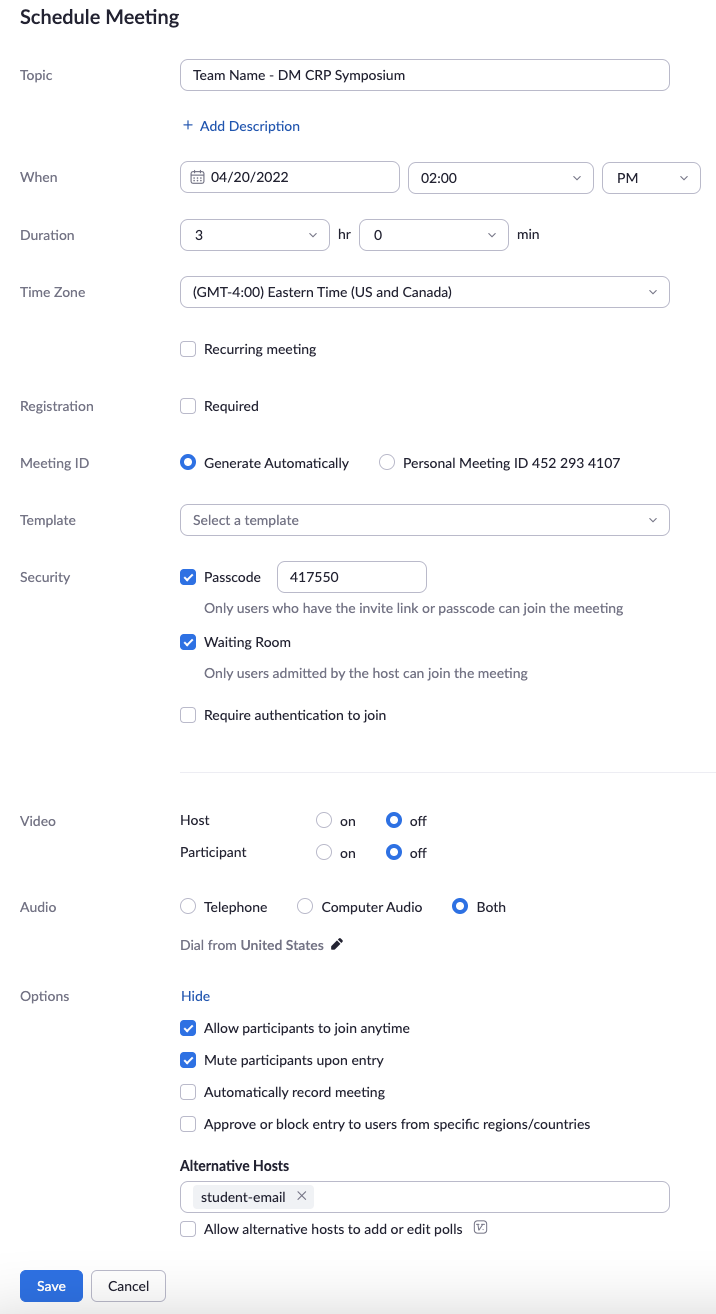 Figure 3. Meeting Settings
-
-
Once you click “Save”, it will show you the meeting invite. Click “Copy invitation”.
 Figure 4. Meeting Invitation
 -
Copy the “Join Zoom Meeting” link into the spreadsheet provided in the email from Maggie. Only copy the URL

Setting changes to protect your meeting
Under Settings > In Meeting (Basic), turn off Annotation, Whiteboard, and Remote Control. This prevents Zoom “bombers” or others with malicious intent from taking over the meeting.

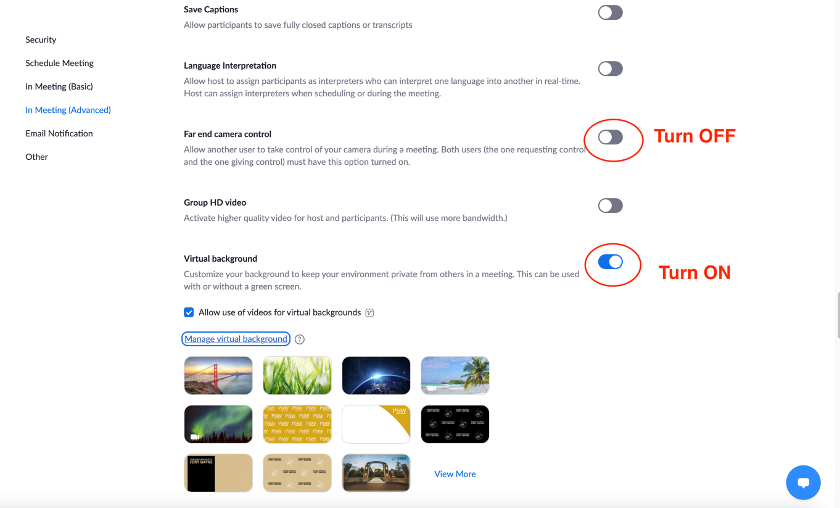
Under Settings > In Meeting (Advanced), turn off Far End camera control. Keep Virtual Background turned on so that guests and students can use a virtual background.
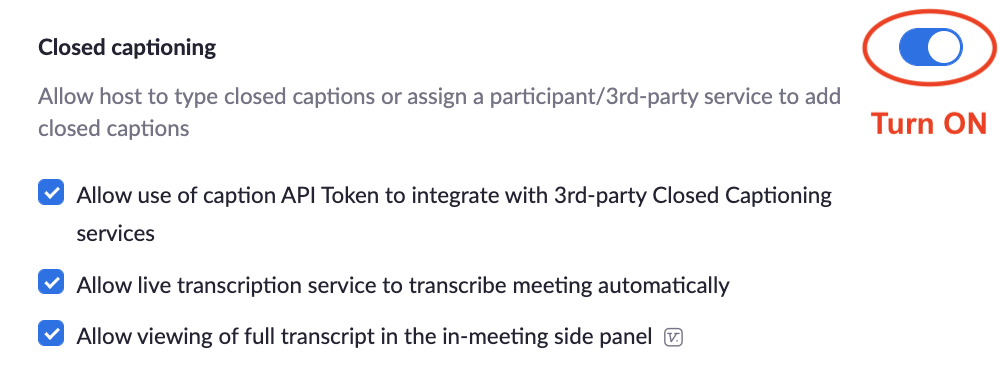
Also Under Settings > In Meeting (Advanced), turn on Closed Captioning. Select "Allow use of caption API Token to integrate with 3rd-party Closed Captioning services", "Allow live transcription service to transcribe meeting automatically", and "Allow viewing of full transcript in the in-meeting side panel".
Zoom Security Features for the day of the symposium
How to expel (remove) someone that is causing disruption or being malicious (they cannot rejoin from the same device): How to remove a participant from your Zoom meeting
Please review this resource and read the four sections on Control Screen Sharing (pg 8), Turn off Annotation (pg 8), Mute Participants (pg 9), and Remove Participants (pg 9): Securing Your Zoom Meeting
Virtual Background for Purdue
Generate a virtual background so your name is easily visible. You can use your first name only or first and last name: Virtual Background Generator
Click here for instructions on how to set your virtual background: Changing your Virtual Background image
On the day of the Symposium, to start the meeting at 2:00 PM ET:
-
Go to purdue-edu.zoom.us/ and login with your 2-factor authentication (Purdue Login on Duo Mobile)
-
Go to “Meetings” on the left-hand menu. Hover over the meeting and click “start”.
 Figure 9. Start Meeting
 -
On the day of the Symposium, when you start the meeting, we recommend you make sure that “Enable Waiting Room” is checked and “Share Screen” is unchecked. See below. You can easily re-enable it if a teammate needs to share their screen.
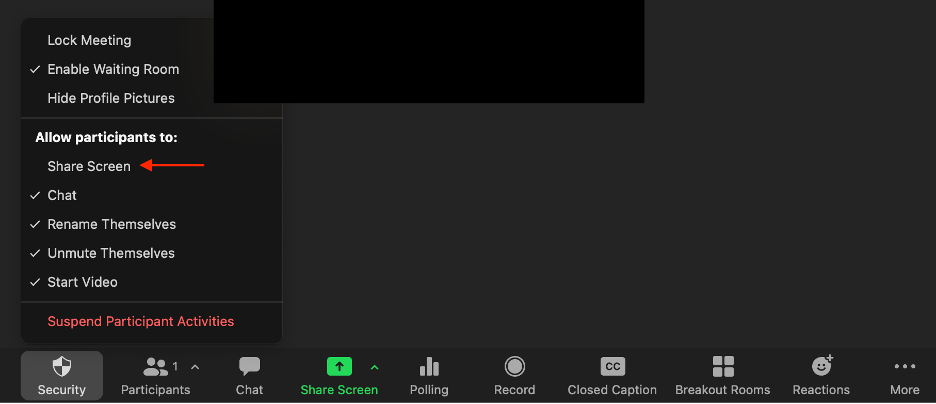 Figure 10. Meeting Settings
 -
After starting the meeting, enable live transcription for closed captioning. Click on "Live Transcript" and then select "Enable"

+