Viewing the Roster in Microsoft Teams
Why Check the Roster?
-
Verify which students, mentors, or co-TAs have access to the team.
-
Create an attendance roster before your first meeting
-
Quickly identify missing members and add them before deadlines.
-
Confirm Owner vs. Member roles when setting channel or file permissions.
Step-by-Step Instructions
-
First, make sure to download MS Teams and navigate to your team. Download Teams
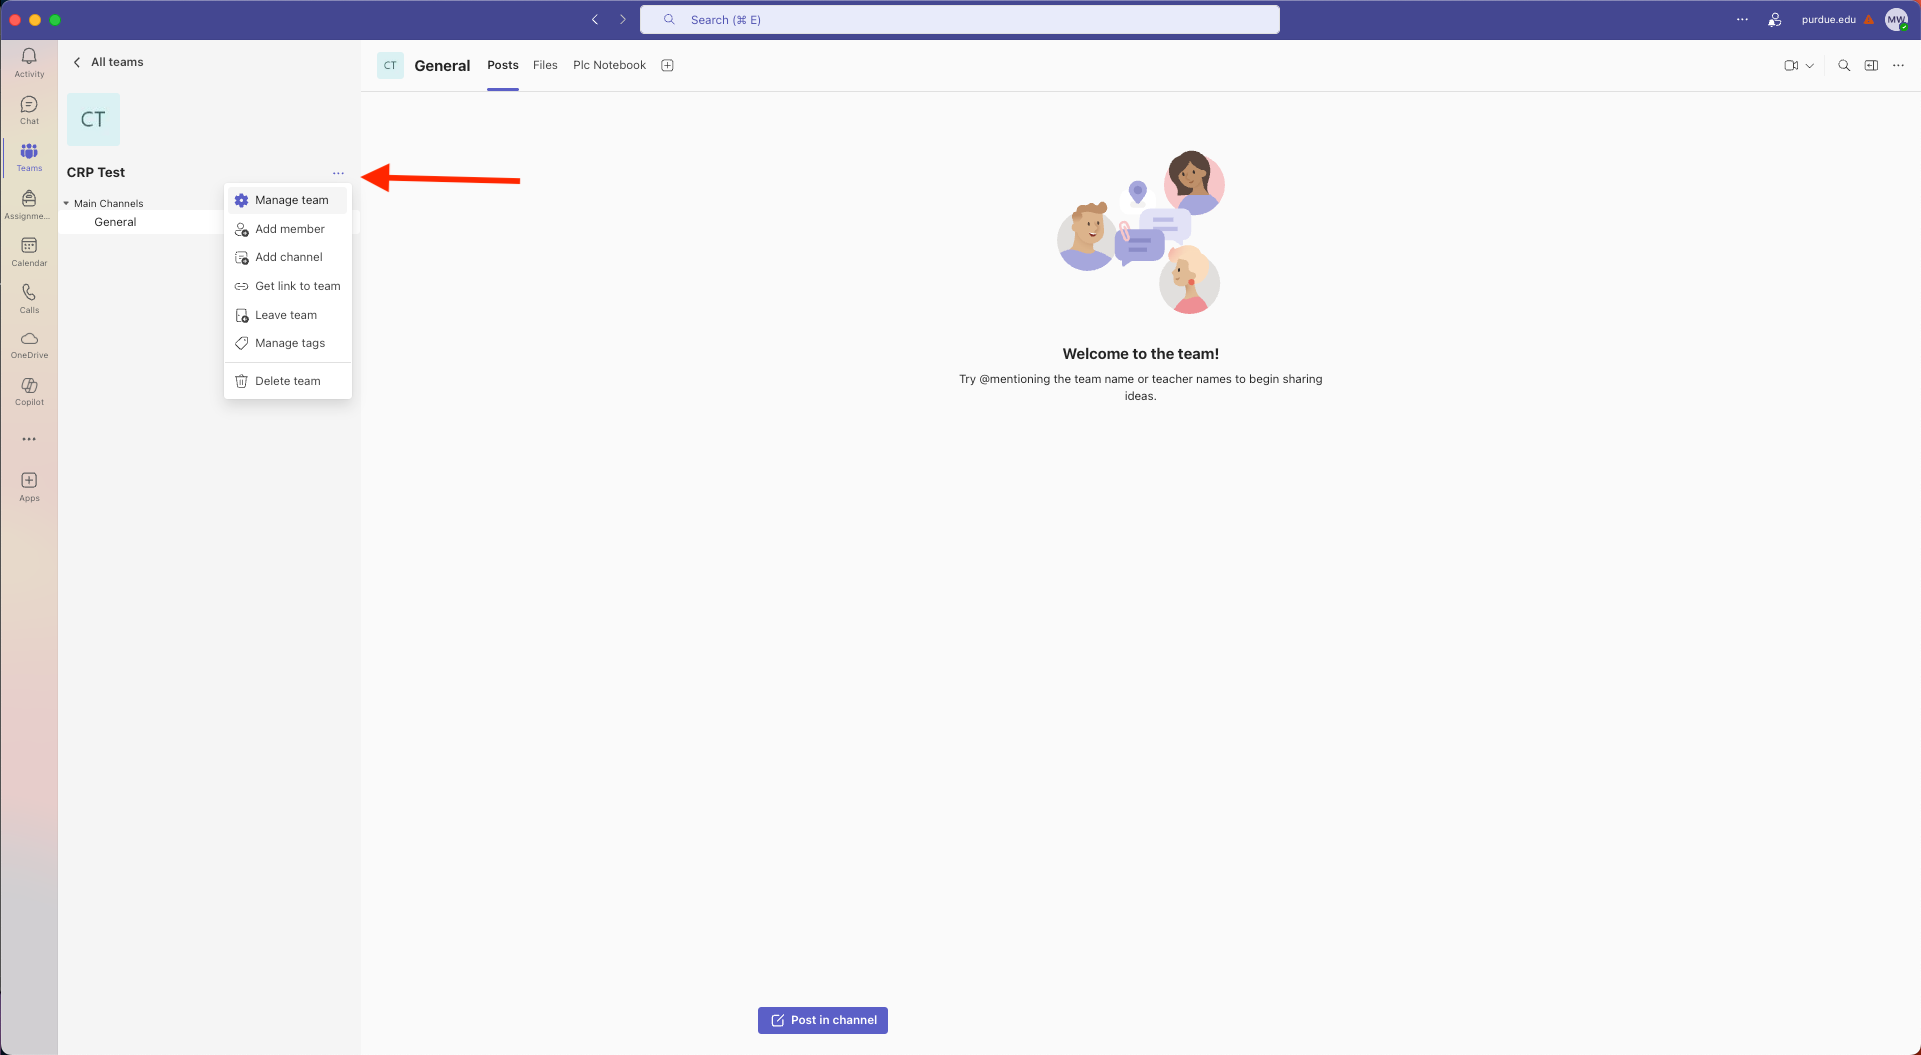 Figure 1. Manage Team
 -
Open Team Settings: Hover over the team name in the left sidebar, click the More options icon (…), and select Manage team.
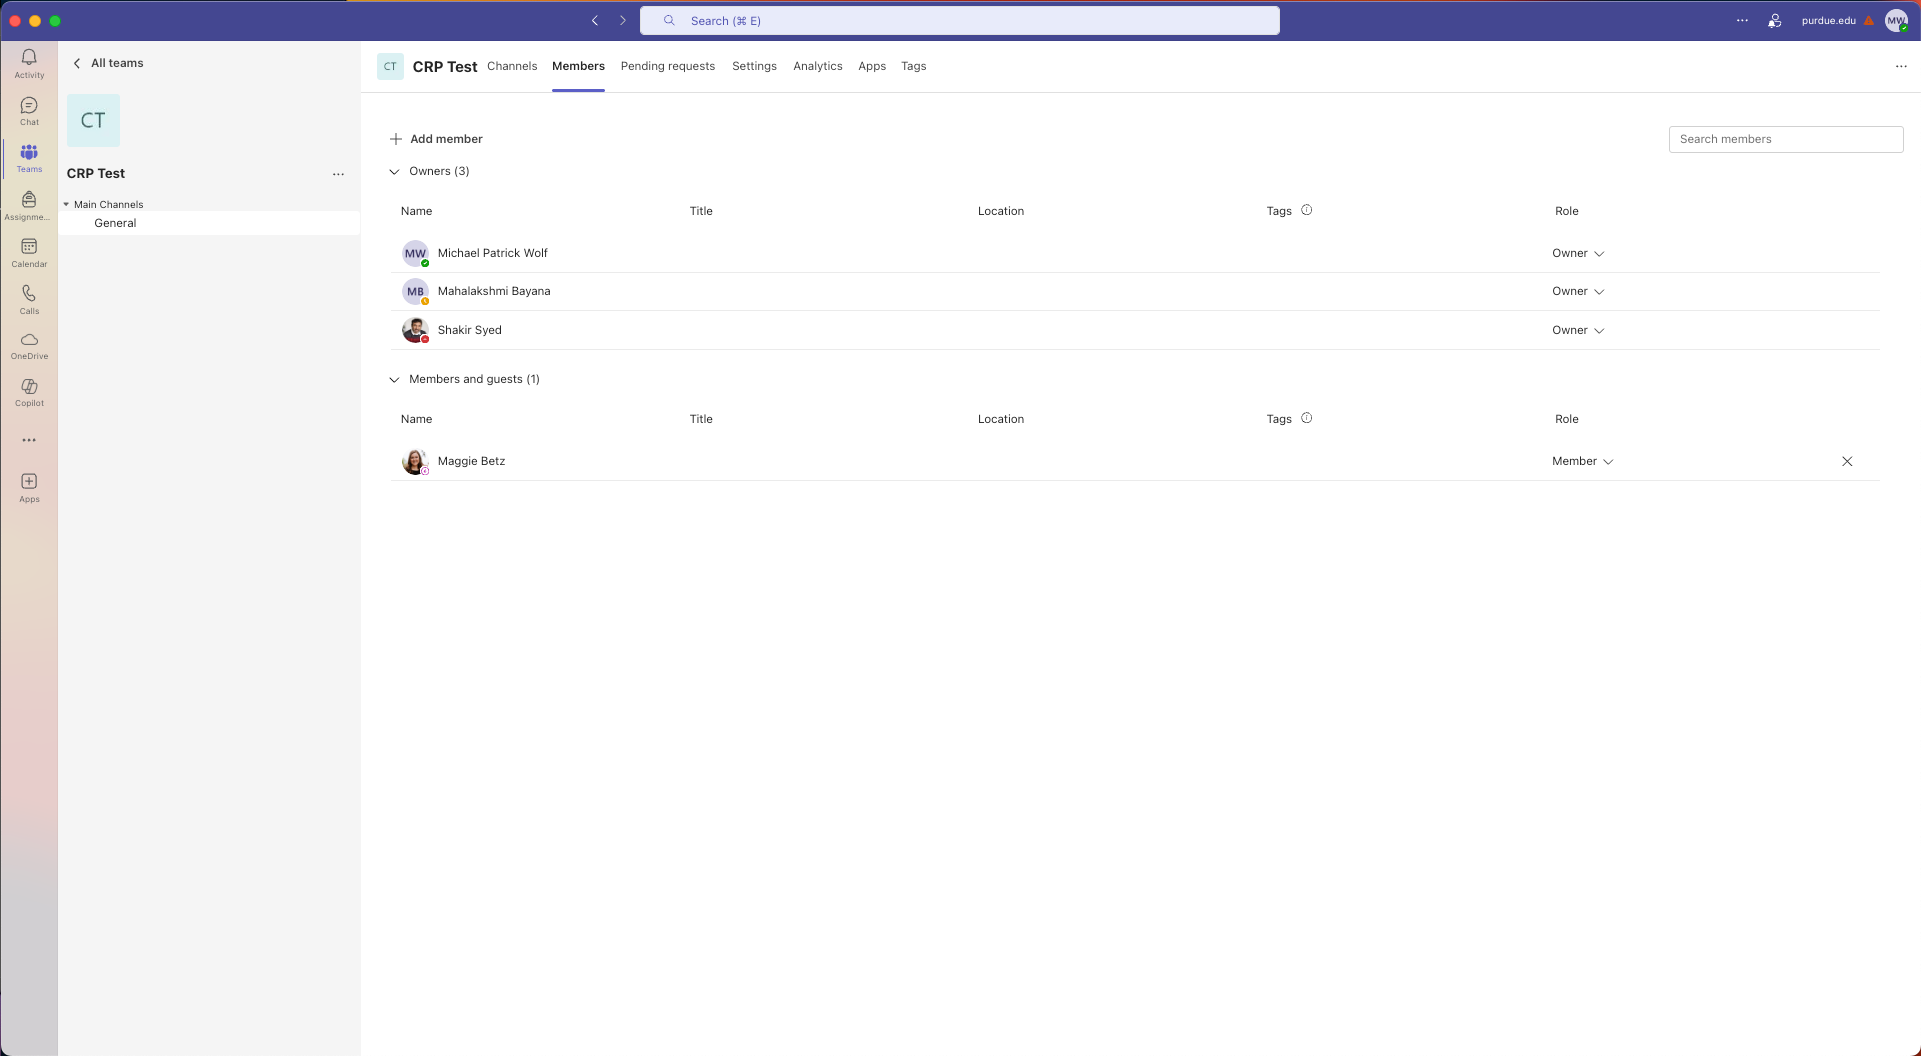 Figure 2. View Members
 -
Navigate to Members: In the top bar of the Manage view, click Members.
-
Review Roles & Status
-
Owners can add/remove members and change settings.
-
Members (students) have standard permissions.
-
Guests usually represent external mentors—double-check their access.
-