Meeting Features in Microsoft Teams
1. Breakout Rooms
Creating Breakout Rooms
-
Open the Breakout panel Click the Breakout rooms icon (two squares) on the top toolbar.
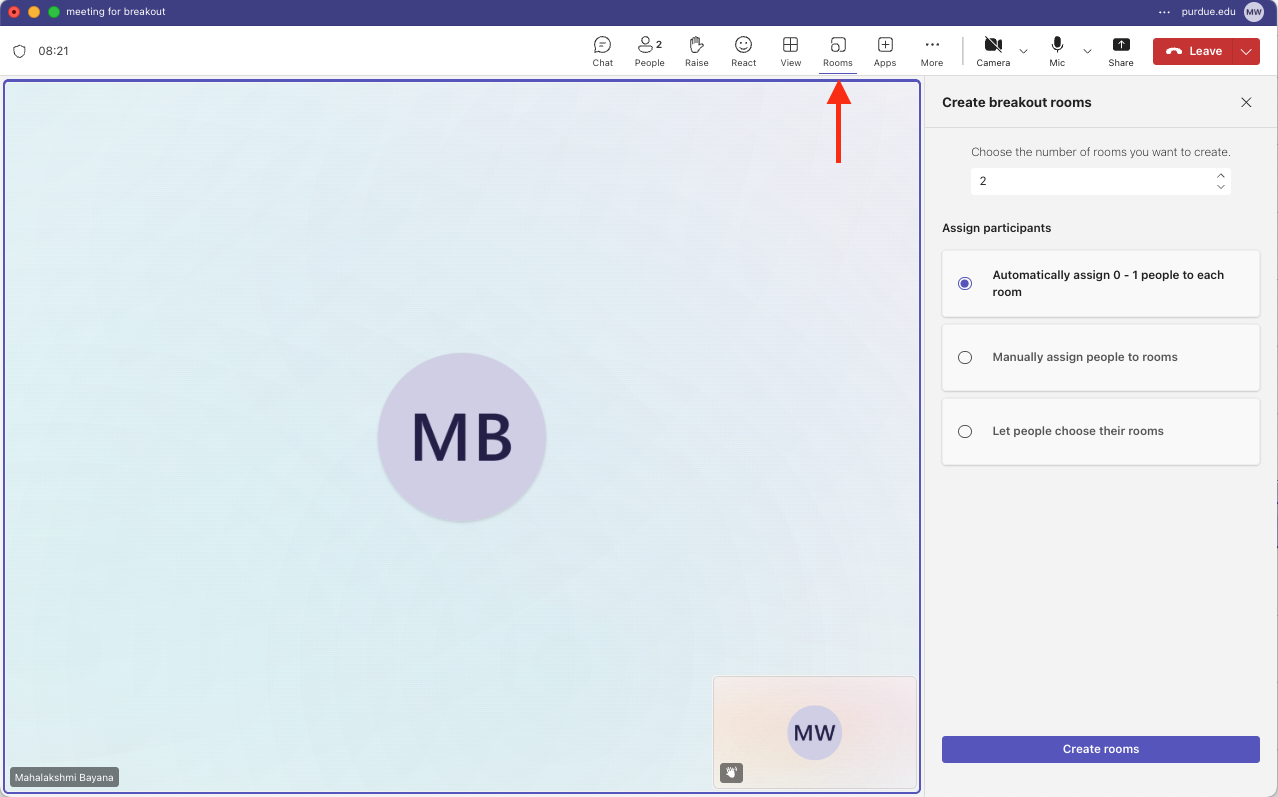 Figure 1. Starting Breakout Rooms
 -
Choose room count Select the number of rooms (up to 50).
-
Assign participants
-
Automatically – Teams distributes participants at random.
-
Manually – Select each person for balanced groups. Click Create rooms.
-
Managing Breakout Rooms
Assign or Move Participants
-
In the panel, click a room > Assign participants > check names > Assign.
-
Drag-and-drop names for quick moves.
Set a Timer
Click the Settings (gear) icon → Set timer → choose 5–120 minutes. Rooms auto-close and return participants when time expires.
2. Accessibility Options
-
Open the Accessibility Menu
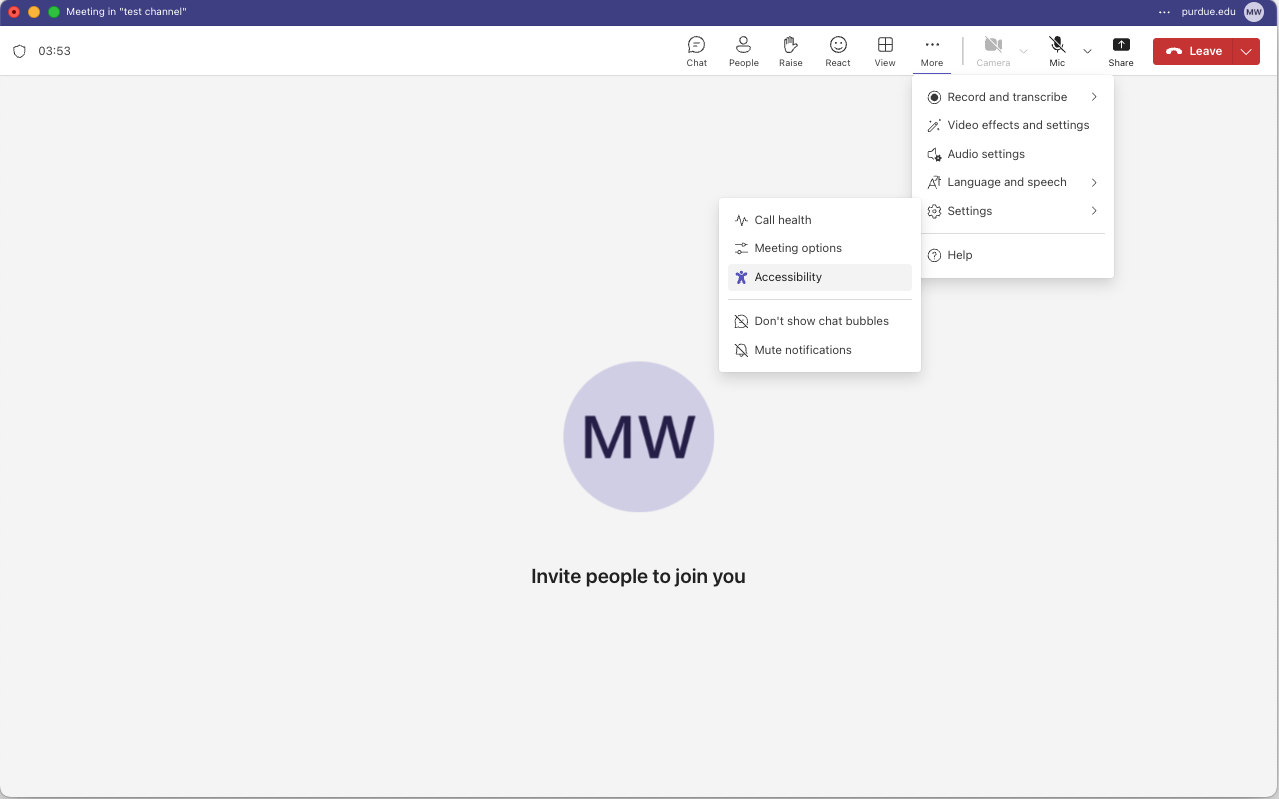 Figure 2. Accessibility
 -
In your meeting, click More (…) → Settings → Accessibility.
3. Recording Meeting
-
Enable recording and Transcription
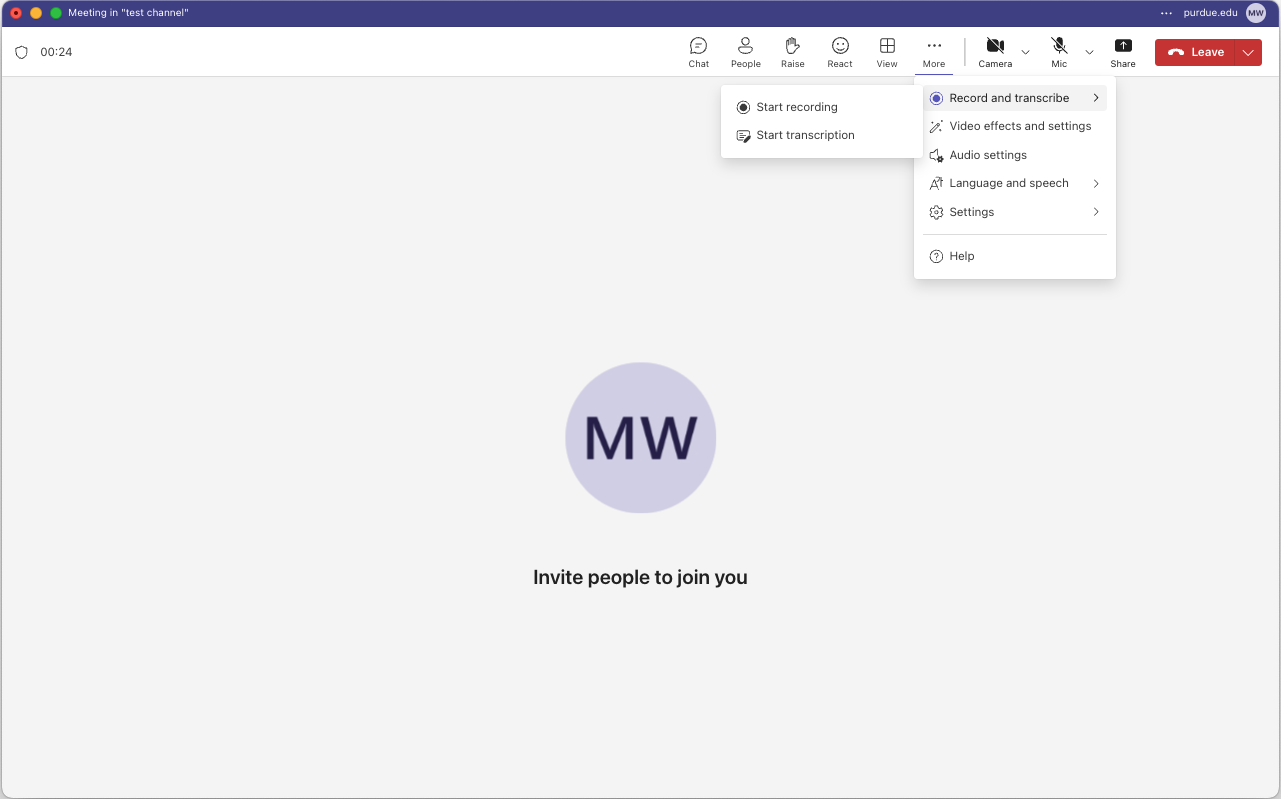 Figure 3. Recording and Transcribing
 -
In your meeting, click More (…) → Record and Transcribe
-
Select the language that will be spoken in your meeting
-
Record meetings and transcripts for those who are absent and for reviewing discussion
-
There will be a post in the channel where the meeting was held which will include the recording.
4. Best Practices
-
Announce breakout procedures at the start—clarify how long rooms run and expected deliverables.
-
Monitor accessibility—remind participants to turn on captions if they need them.
-
Share resources in chat—link to OneNote pages or documents for reference during breakout.
-
Record key segments in the main meeting to support later review or accommodate absentees.