Introduction to Jupyter
In this document, we will:
-
Learn how to navigate and utilize Jupyter Notebooks.
-
Practice writing basic Python commands.
Jupyter Tools: Notebook vs. Lab
-
Jupyter is a web based interactive computing platform. The primary tool, a notebook (.ipynb files), is like a notebook for code, with markdown cells for commentary, multiple different languages supported, and easy kernel switching. Jupyter Lab is a great place to build and edit the notebooks and is a great place to build and learn from code because of each cell having its own separate executable block.
-
JupyterLab is a web-based platform for coding, data analysis, and visualization, offering a customizable interface and extensible design to support diverse workflows in data science and beyond.
-
Jupyter Notebook offers a simplified, lightweight notebook authoring experience. A notebook is a collaborative document that integrates code, explanatory text, data, and visualizations. Paired with an editor like JupyterLab, it creates an interactive space for quickly testing and illustrating code, analyzing and visualizing data, and communicating ideas effectively.
*Using anvil to launch a Jupyter Notebook
Let’s start off by starting up our first Jupyter session on Anvil! We always use the URL https://ondemand.anvil.rcac.purdue.edu and the ACCESS username that you were assigned (when you setup your account) and the ACCESS password that you chose. These are NOT the same as your Purdue account!
|
These credentials are not the same as your Purdue account. |
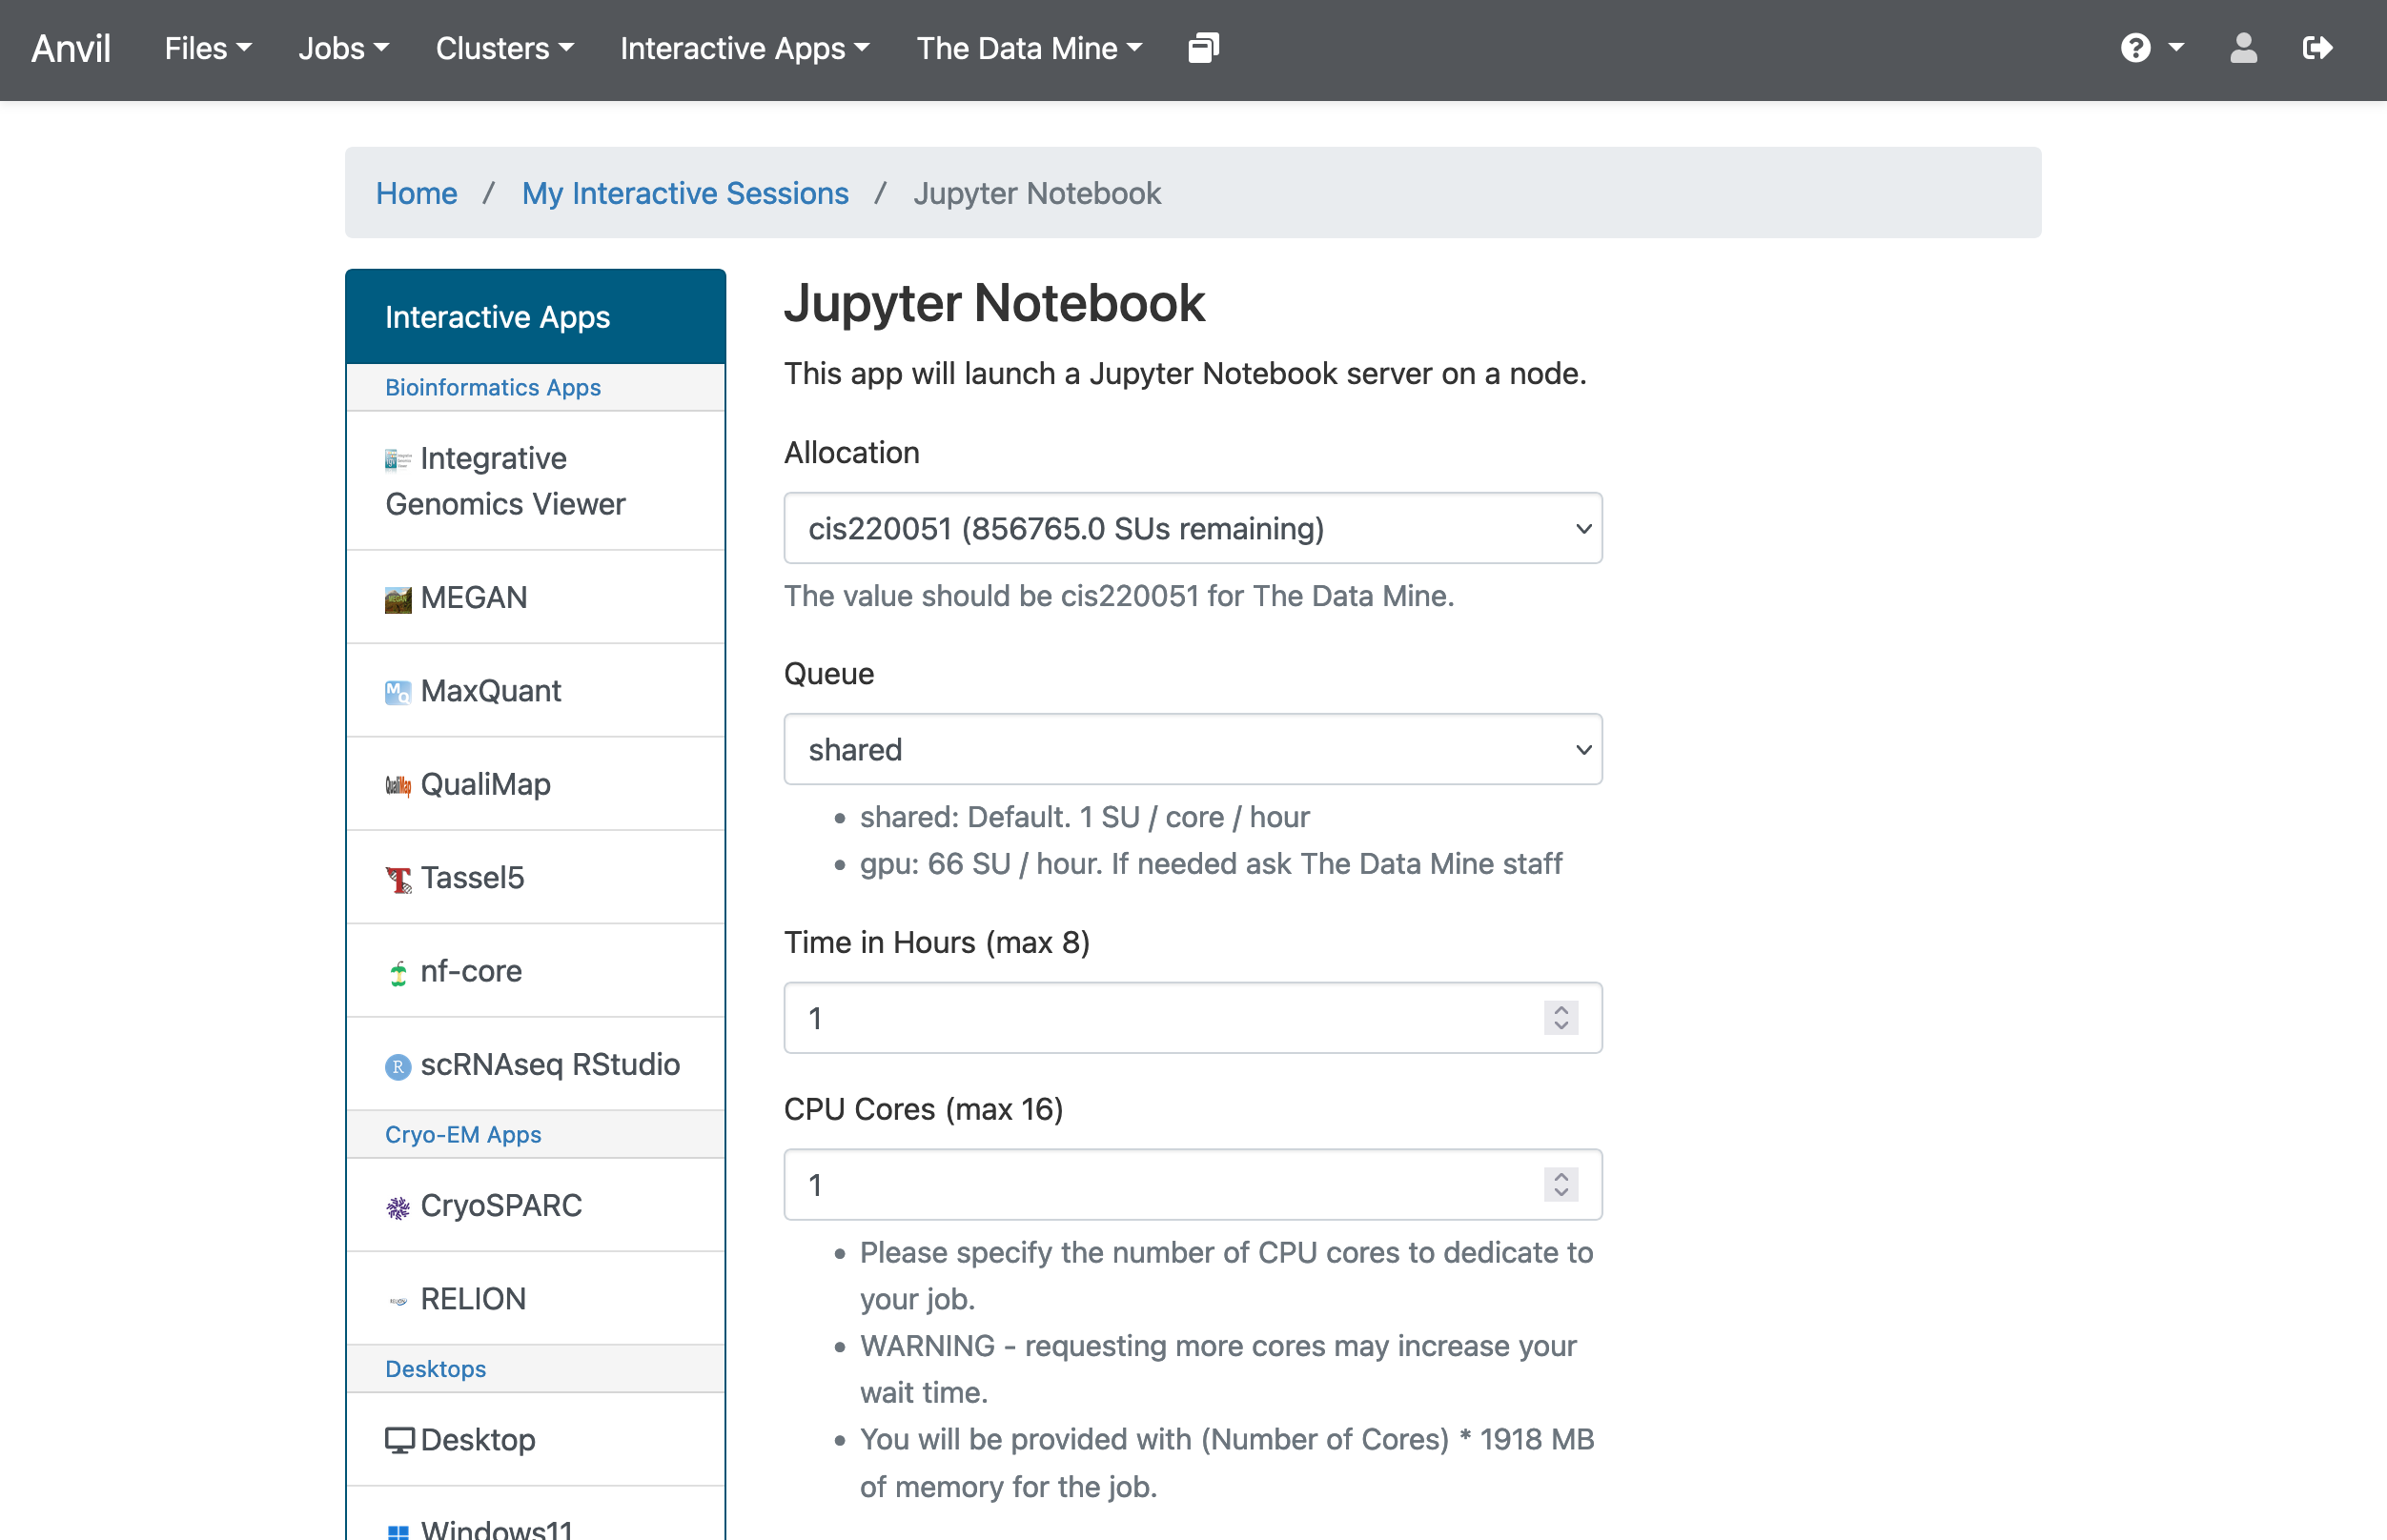
In the upper-middle part of your screen, you should see a dropdown button labeled The Data Mine. Click on it, then select Jupyter Notebook from the options that appear. If you followed all the previous steps correctly, you should now be on a screen that looks like this:

If your screen doesn’t look like this, please try and select the correct dropdown option again or ask one of the TAs during seminar for more assistance.
|
Jupyter Lab and Jupyter Notebook are technically different things, but in the context of seminar we will refer to them interchangeably to represent the tools you’ll be using to work on your projects. |
There are a few key parts of this screen to note:
-
Allocation: this should always be cis220051 for The Data Mine
-
Queue: again, this should stay on the default option
sharedunless otherwise noted. -
Time in Hours: The amount of time your Jupyter session will last. When this runs out, you’ll need to start a new session. It may be tempting to set it to the maximum, but our computing cluster is a shared resource. This means every hour you use is an hour someone else can’t use, so please ONLY reserve it for 1-2 hours at a time.
-
CPU cores: CPU cores do the computation for the programs we run. It may be tempting to request a large number of CPU cores and set it to the maximum, but our computing cluster is a shared resource. This means every computational core that you use is one that someone else can’t use. We only have a limited number of cores assigned to our team, so please ONLY reserve 1 or 2 cores at a time, unless the project needs more cores.
|
The Jupyter Lab environment will save your work at regular intervals, so that at the end of a session, your work should be automatically saved. Nonetheless, you can select File from the menu and Save Notebook any time that you want. (It is not necessarily, because the notebooks save automatically, but you can still save anytime if you want to.) |
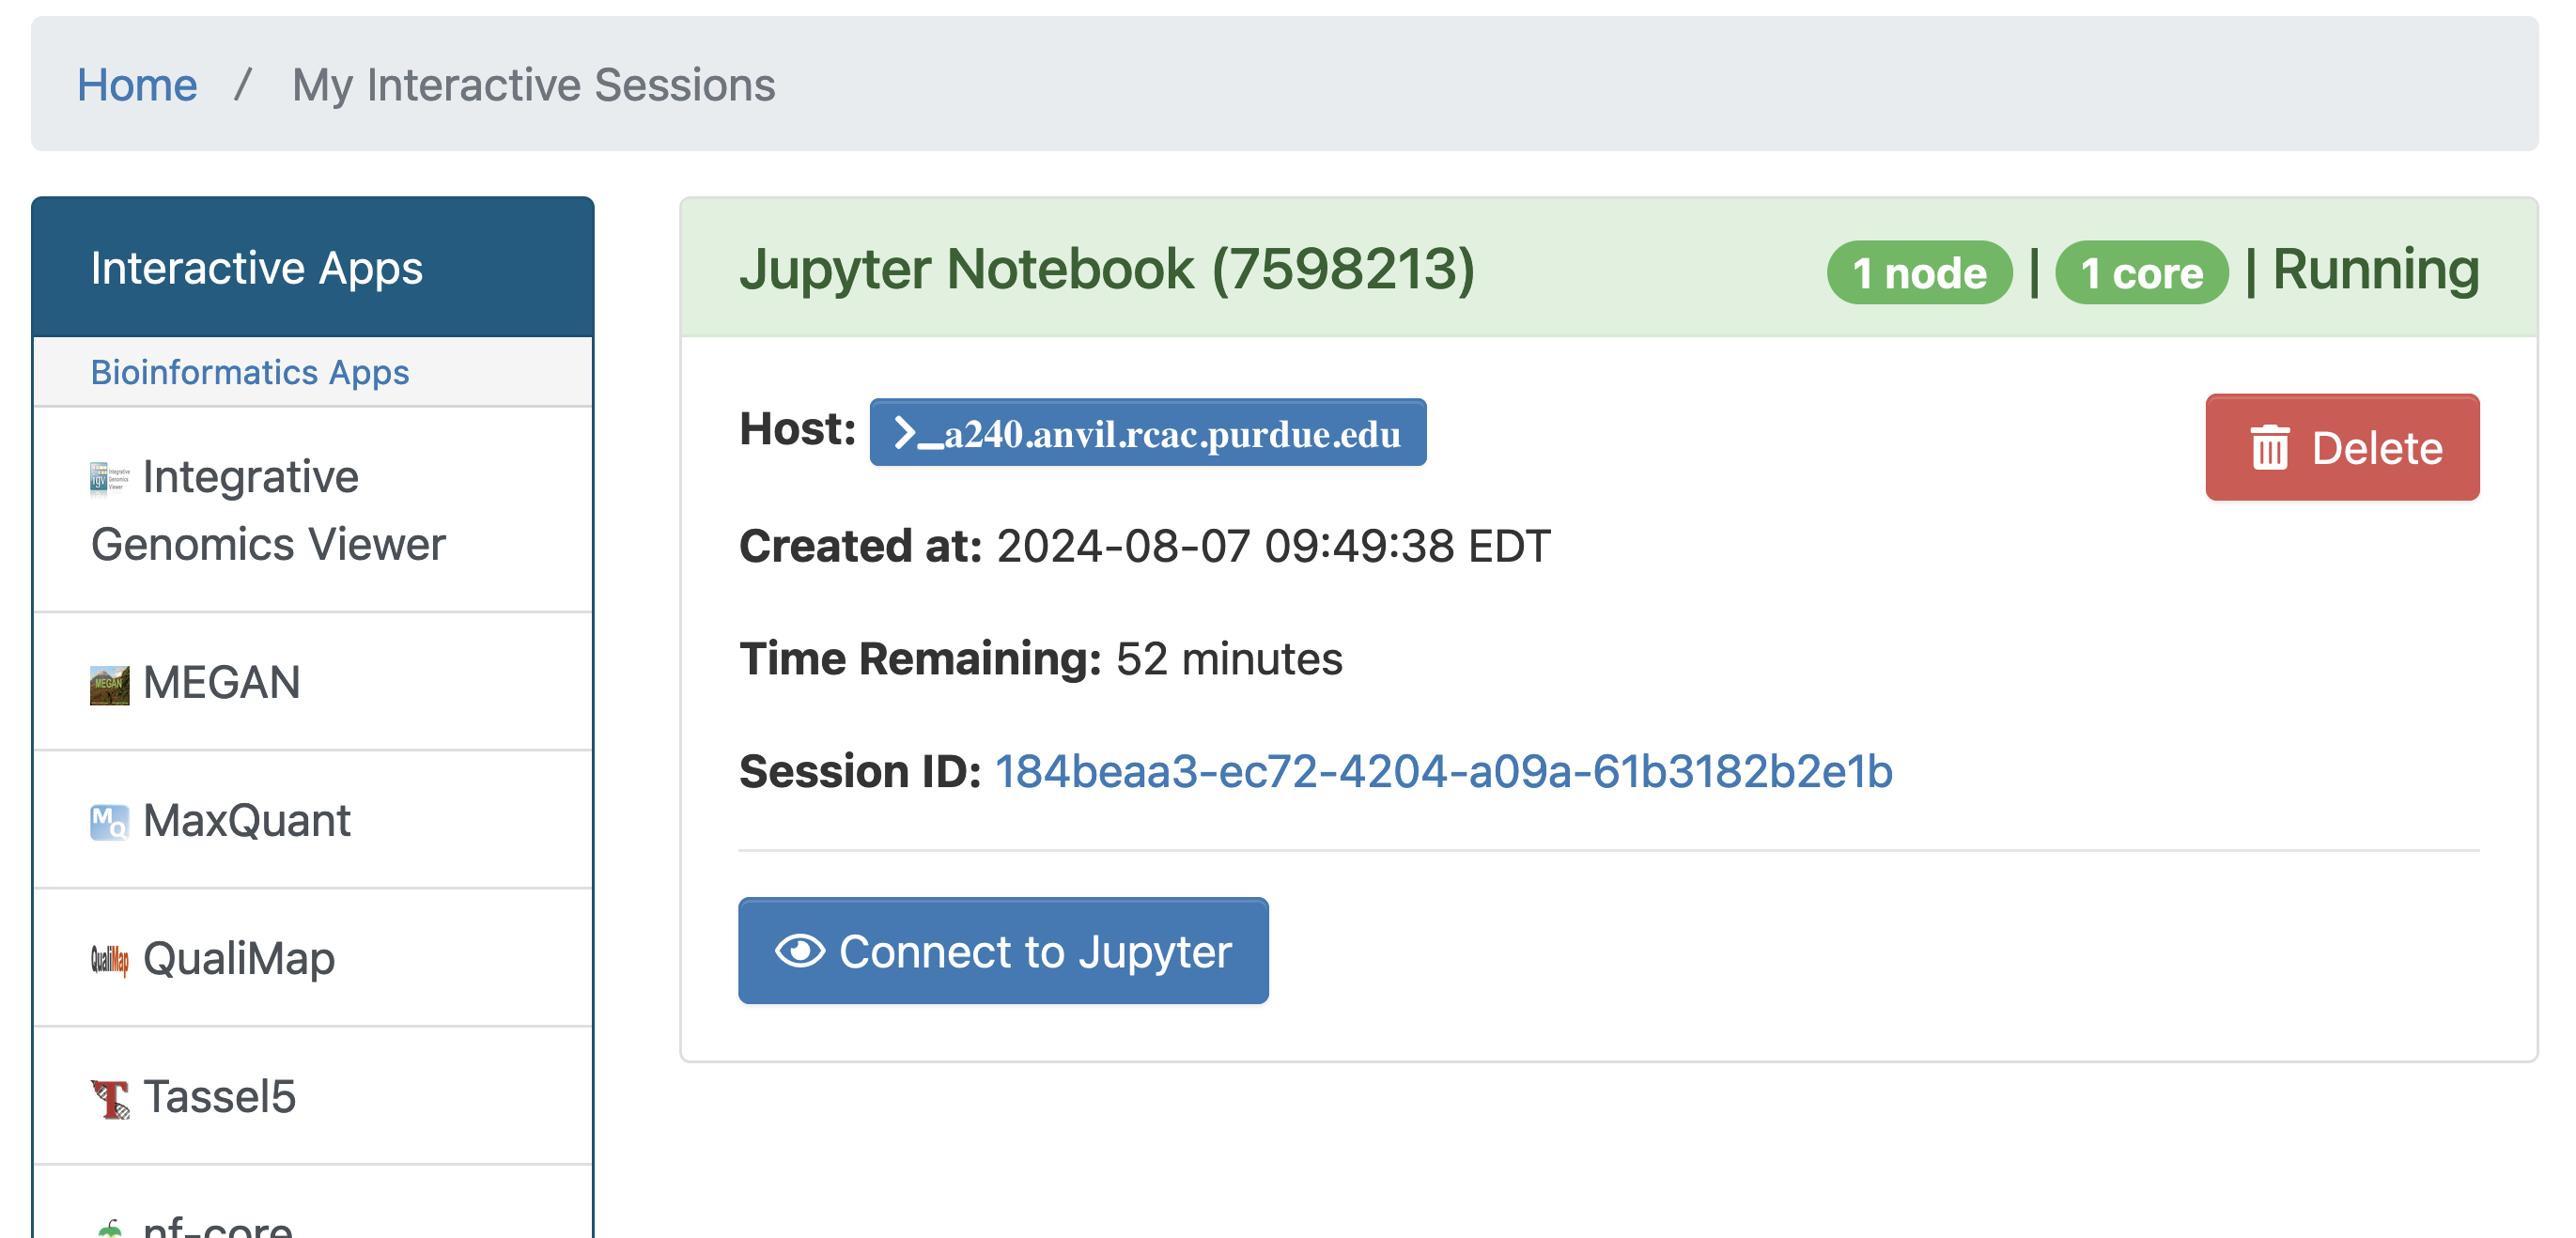
With the key parts of this screen explained, go ahead and select 1 hour of time with 1 CPU cores and click Launch! After a bit of waiting, you should see something like below. Click connect to Jupyter and proceed to the next question!

|
You likely noticed a short wait before your Jupyter session launched. This happens while Anvil finds and allocates space for you to work. The more students are working on Anvil, the longer this will take, so it is our suggesting to start your projects early during the week to avoid any last-minute hiccups causing a missed deadline. Please do not wait until Fridays to complete and submit your work! |
Running a cell in Jupyter Notebook
|
In the upper right-hand corner of your Jupyter Lab notebook, you will see the current kernel for the notebook. Use |
As an example, in the first cell, we can write: print("Hello World!") and then press Shift-Enter to run the Python code in the cell. The output: Hello World! should appear below the cell after you run it.
|
To display text in Python, you need to enclose the text in quotes to indicate it is a string. The print() function allows you to output content that is not just the result of the last line. It will display anything you place inside the parentheses ().
Cell Types
Jupyter notebooks are made up of cells that serve two main purposes:
-
Markdown cells – These cells display text.
-
Code cells – These cells contain Python code, which can be executed. You can use syntax highlighting for writing comments and helping with your codes readability.
By default, Jupyter Notebook creates new cells as Python (code) cells.
Command Mode and Edit Mode
Jupyter Notebook works in command mode and edit mode:
-
Command Mode – This is the default mode when you open a notebook. In this mode, a single click on a cell highlights it.
-
Edit Mode – To edit a cell’s content, double-click on it to switch to edit mode. Press ESC to exit edit mode and return to command mode and press ENTER to switch from command mode to edit mode.
Math Operations in Python
Python can perform a variety of mathematical operations. Let’s start with addition (+), subtraction (-), multiplication (*), and division (/). Python cells execute code and display the result of the last line. Run the cells by clicking inside them and pressing shift-enter.
5 + 510
25 / 55
25 * 4100
25 - 520
Saving and Naming a Jupyter Notebook
To rename the notebook, click on its title at the top of the page, enter the new name, and press Enter. To save the notebook, select "Save" from the File menu. This action will generate an .ipynb file and store it in your current directory.