Visual Studio Code (VS Code)
Visual Studio Code, also known as VS Code, is a powerful source-code editor developed by Microsoft. It includes features such as syntax highlighting, debugging, code completion, embedded git support, and a wealth of extensions to customize and enhance the editing experience. VS Code is available for Windows, Mac, and Linux. In The Data Mine, the Linux version of VS Code on Anvil can be particularly useful for some Corporate Partner projects.
How can I launch VS Code on Anvil?
The following assumes you already have accounts on ACCESS and Anvil.
To launch VS Code on Anvil, browse to ondemand.anvil.rcac.purdue.edu and authenticate normally.
Once logged in, at the very top of the browser window you will select the The Data Mine → Visual Studio Code dropdown menu. You’ll select a number of hours to run, a number of CPU cores to use, and a Starting Directory. For the number of hours to run, select a time slightly longer than you think you will need. As soon as you hit the time limit, your session will be terminated. Estimating a bit more time than you think you need will keep your session from terminating too quickly. The number of CPU cores you should select depends upon whether you plan to actually execute or debug code within VS Code, and how large the memory and CPU requirements for the code you want to debug or execute will be. For doing simple text editing a single CPU core will be sufficient! If you are debugging python code, or executing a more complex framework such as streamlit, you will want to choose more CPU cores, which in turn will give you more memory. It’s convenient to select the starting directory to be close to where you intend to work, but you can always navigate to any directory once you launch VS Code anyway, so it’s not terribly important to get this exactly right at the time you launch VS Code. Once these choices have been made, click the Launch button to submit a request to launch VS Code. Once it is ready, you can click the Connect to VS Code button, which will open VS Code in a new browser tab.
Initial Configuration of VS Code
There are a few configuration changes you should make the first time you launch Visual Studio Code.
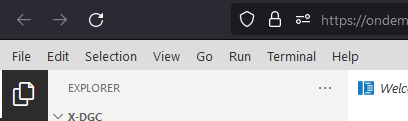
1) If the File, Edit, Selection, View, Go, Run, Terminal, Help menu bar does not appear at the top as seen here:
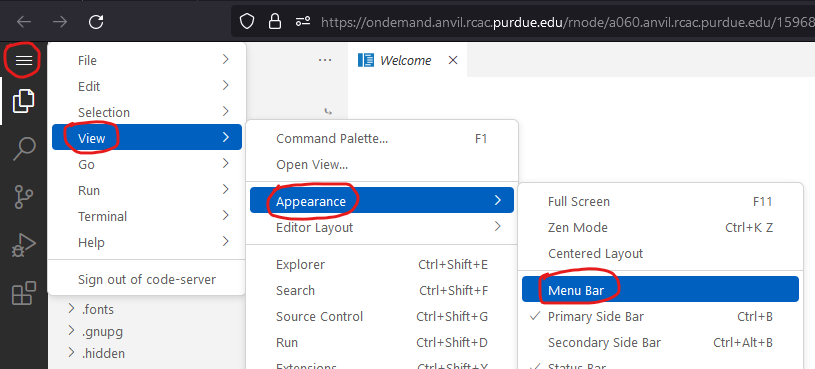
you will want to enable it by clicking the hamburger menu (the three horizontal lines in the upper left), then View → Appearance → Menu Bar as shown below:
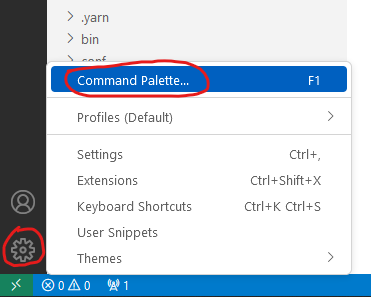
If this doesn’t work for some reason, you can enable it a different way by opening the Command Palette by pressing the F1 key in the upper left part of your keyboard and then in the search box that appears, type View Toggle Menu Bar and press the enter key. On some laptops you may have to press the Fn key on your keyboard and the F1 key simultaneously. If you are still unable to open the Command Palette, you can click the gear in the extreme lower left, then select Command Palette and then type View Toggle Menu Bar and press Enter.
2) The next thing will be to install a few extensions so VS Code knows how to edit and debug Python and R. To do so, click the Extensions icon on the left sidebar as shown:
Then in the Search Extensions in Marketplace box enter python. It will find many extensions for python, but the one you should select looks like this:
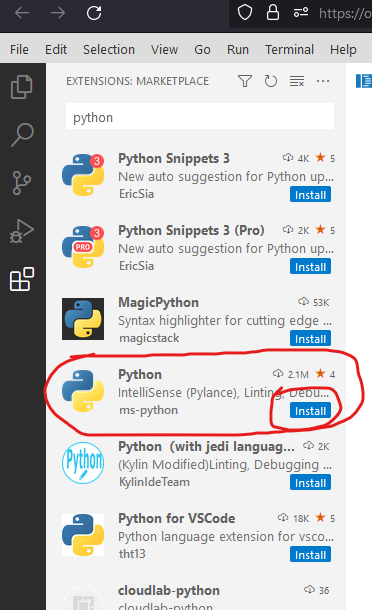
and is titled Python with description "Python language support with extension access points for IntelliSense (Pylance), Debugging…" authored by ms-python. Click the blue Install button next to this extension to install it.
Then in the Search Extensions in Marketplace box enter R. It will find many extensions for R, but the two you should select look like this:
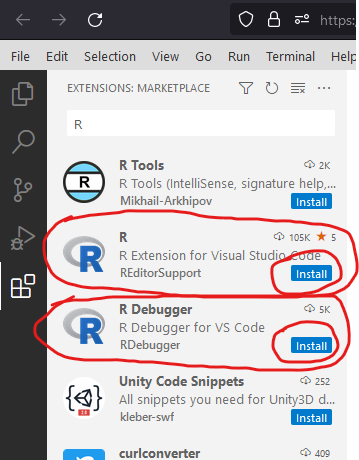
and are titled R with description R Extension for Visual Studio Code authored by REditorSupport, and R Debugger with description R Debugger for VS Code, by RDebugger. Click the blue Install button next to each of these extensions to install them.
3) Now that we have the Python extension installed we have to tell VS Code which Python Interpreter to use. By default, it will not use the Data Mine version of Python available via the seminar kernel, but will use a rather old version with very few Python packages. We want to tell it to use the Data Mine version of Python, which includes over 700 additional Python packages like Pandas, Numpy, machine learning libraries, etc. To tell it to use the Data Mine version, open the Command Palette by pressing the F1 key in the upper left part of your keyboard or clicking the gear in the lower left and selecting Command Palette, then in the search box type python select interpreter and press enter. Click on + Enter interpreter path…, then paste the following: /anvil/projects/tdm/apps/lmodbin/python-seminar/python3 and press Enter.
All of the above changes will be remembered for all future invocations of VS Code so they you shouldn’t have to repeat them again.
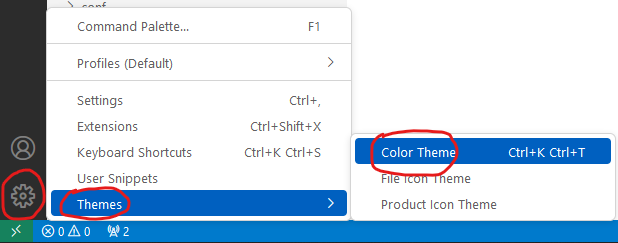
4) Optionally change the theme from light to dark by clicking the gear in the lower left, then selecting Themes and then Color Theme, then select something like Dark (Visual Studio).
Debugging Python Code
See code.visualstudio.com/docs/python/debugging. There are many possible configuration options discussed here that are not strictly necessary. You may want to jump ahead on this page to the Basic Debugging section.
Using the Python package Streamlit With VS Code
Some python libraries like streamlit and flask require you to launch them from a terminal window at a bash prompt by typing something like streamlit run filename.py. This will launch a streamlit program you can connect to using your web browser and interact with graphically. VS Code makes this easy!
There are some one-time steps you must first take for streamlit to work with VS Code. You must create a .streamlit directory in your home directory and then create three special files within that .streamlit directory with specific names and contents. This can be done by executing the following under bash from a Terminal window launched from Jupyter Notebook, from a %%bash code cell in Jupyter Notebook, or any number of other ways:
mkdir -p ~/.streamlit
cat > ~/.streamlit/config.toml << HERE
[server]
enableXsrfProtection=false
enableCORS=false
[browser]
serverAddress = "localhost"
HERE
cat > ~/.streamlit/credentials.toml << HERE
[general]
email = ""
HERE
cat > ~/.streamlit/secrets.toml << HERE
password = "TDMisgreat"
HERE
The last file, ~/.streamlit/secrets.toml, includes a password that we can optionally require to access our streamlit applications. This is done to make sure no one outside of your Corporate Partners group can connect to your streamlit server while you are running it. This is already unlikely since they would have to have a session on the same Anvil back-end node as you while you are running streamlit, and they would have to actively try to connect to the right port. Even though it’s unlikely, it’s still prudent to use a password to prevent any any accidental exposure of sensitive data. Be sure to edit this file and change the password from the default above! Note that the password requirement is not enforced by your streamlit programs by default. You must explicitly add code to your streamlit script to require a password and check it against the one we have saved in our secrets.toml file. Here is some example python code that does that. Your programs should include this code to enable password protection:
import hmac
import streamlit as st
def check_password():
"""Returns `True` if the user had the correct password."""
def password_entered():
"""Checks whether a password entered by the user is correct."""
if hmac.compare_digest(st.session_state["password"], st.secrets["password"]):
st.session_state["password_correct"] = True
del st.session_state["password"] # Don't store the password.
else:
st.session_state["password_correct"] = False
# Return True if the passward is validated.
if st.session_state.get("password_correct", False):
return True
# Show input for password.
st.text_input(
"Password", type="password", on_change=password_entered, key="password"
)
if "password_correct" in st.session_state:
st.error("Password incorrect")
return False
if not check_password():
st.stop() # Do not continue if check_password is not True.
# Main Streamlit app starts here.
# Anything below here is only run if the password is correct.
st.write("Put the rest of your streamlit app here!!!")
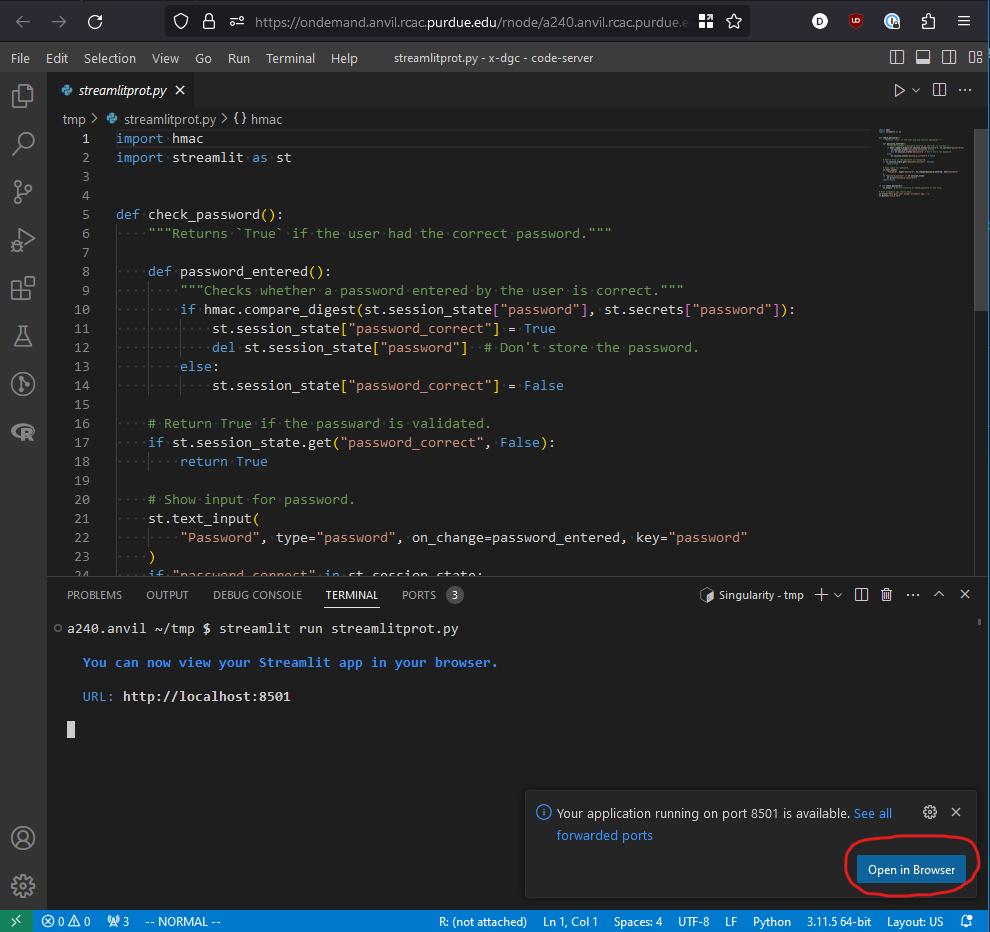
st.button("Click me")Let’s say you’ve saved the above python code to the file mystreamlit.py. To actually execute this using VS Code launched from an Anvil VS Code session you will select the Terminal → New Terminal dropdown menu, and from within that Terminal pane type:
streamlit run mystreamlit.pyVS Code will recognize that you have launched a streamlit application that is now listening on a specific port. It will ask you if you would like to open a new browser tab connected to that tab. Click Open in Browser! It will look like this:
Switch to the new tab and you should be prompted for the password used in ~/.streamlit/secrets.toml and it should then run the streamlit app!
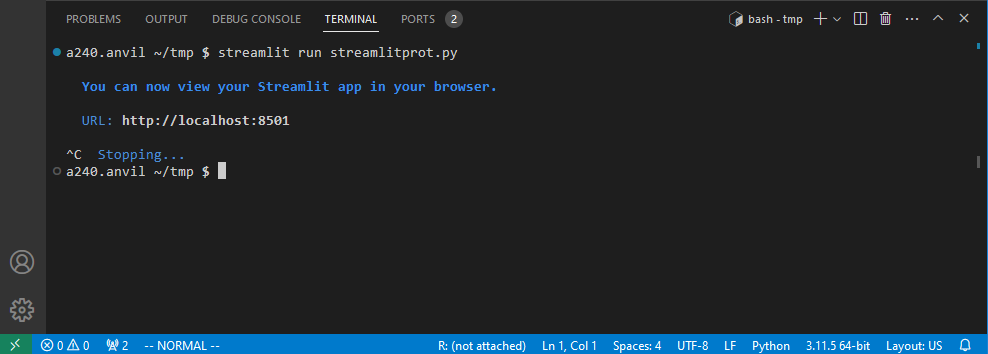
When you want to terminate your streamlit app, you can press Control-c in the VS Code Terminal pane like this: