Getting Started with Anvil
Once you’ve got your account configured it’s time to get started using Anvil!
The steps below provide a high level overview of some of the resources that we have available at Purdue.
OnDemand
The OnDemand tool is an open source platform for a multitude of things. At Purdue in The Data Mine we use it to launch our Jupyter Lab sessions.
Follow the instructions below to launch your first Jupyter Lab instance.
|
Be careful when changing resources on your instance. These high performance computing resources are shared by multiple users. Making a very large request can have negative impacts on other users. |
-
Open your favorite browser, we usually use Firefox (not Chrome, not Edge, and not Safari), and navigate to ondemand.anvil.rcac.purdue.edu.
-
Log-in with your ACCESS credentials that you set up previously.
-
Authenticate with Duo.
-
After you finish your authentication, there is a landing page for Anvil. This page has a dark-grey options bar across the top of the browser window with multiple options listed.
-
Select the second to last option, which should say "The Data Mine". This will open a drop-down list for the different Data Mine appications on Anvil.
 Figure 1. The OnDemand Options Bar
 -
Select the application that you would like to use from the drop-down list. For seminar projects, this would be the
Jupyter Notebookapplication.-
This will open a new screen that will give you options for how you want to start the application.
-
-
An overview of the different application choices for the
Jupyter Notebookapplication is included below:-
Allocation- this is automatically populated with The Data Mine’s information. It only needs to be changed if you’d rather use GPU instead of CPU. -
Queue- similar toAllocation, this only needs to be changed if you want to use GPU instead of CPU. -
Time in Hours- This is the amount of time that the application will run for. It can be helpful to change this to a longer time.-
For example, if you’re going to be working with a Jupyter Lab session in your Team’s lab meeting, you can change the value to 2 hours.
-
-
CPU Cores- This changes the number of cores and allocated memory that will be requested for your session.-
If you notice that your code is frequently crashing, it may be beneficial to increase the number of cores.
-
-
-
If you have all of your settings updated as needed, you can click the blue
Launchbutton at the bottom of the screen. -
Once the session is ready you’ll see a link to connect to the Jupyter Notebook.
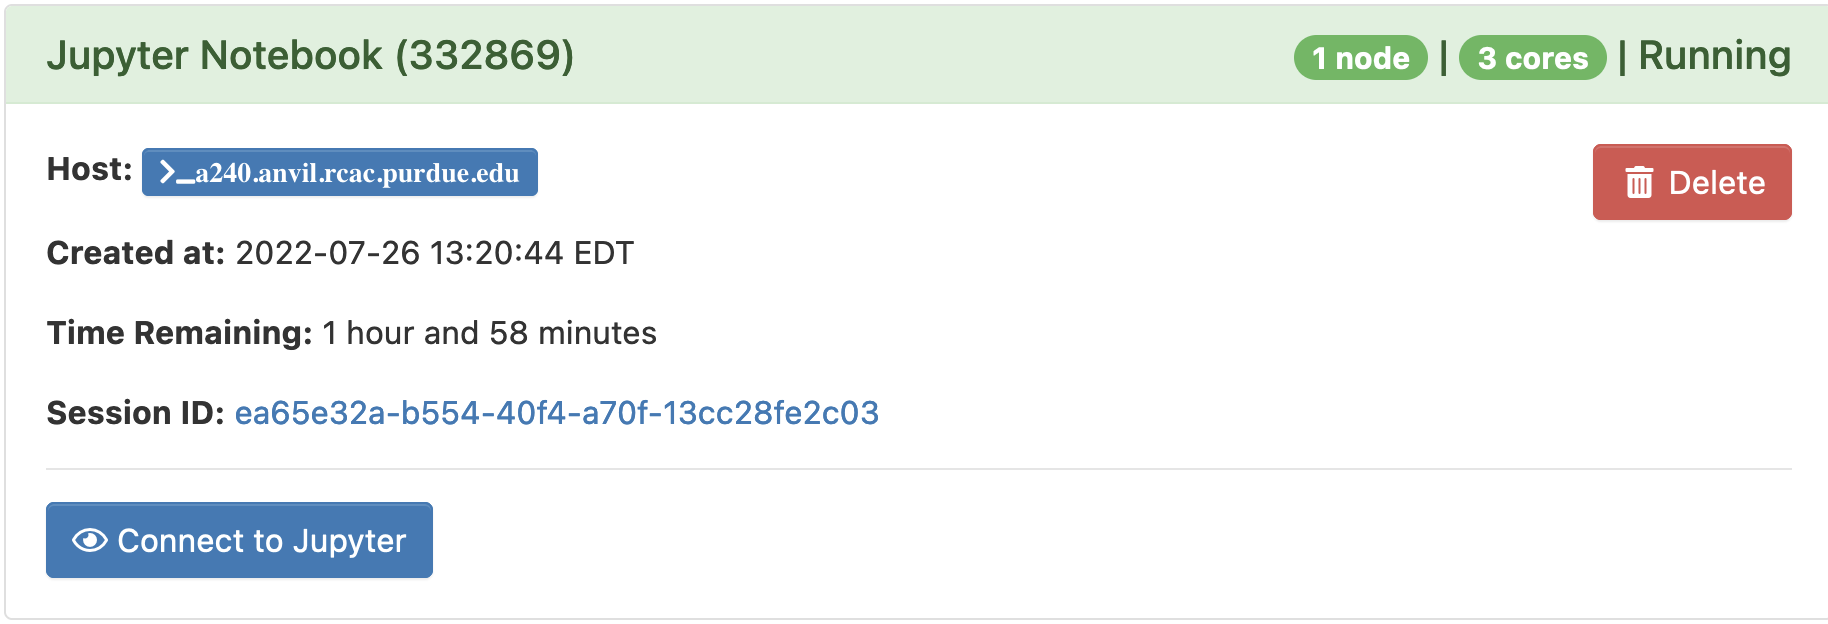 Figure 2. Jupyter Notebook Launch
 -
In the window representing the running Jupyter Notebook task, select
Connect to Jupyterto open the Jupyter Notebook in a new window.
|
Pay careful attention to your time remaining once the cluster has started. Once the time runs out the session will end and you cannot save any new changes. |
Helpful Tips
-
It is helpful to create a symlink to your team’s folder in Jupyter Lab.
-
To do this, open a cell in Jupyter Lab, and type this code exactly (be sure to check it carefully, including the spaces).
-
NOTE You only need to run this command one time (ever)! If you run it more than once Anvil will get angry.
%%bash

ln -s /anvil/projects/tdm/corporate $HOME
-