Using GPU’s on Anvil
For some projects, GPU usage may become desirable. This guide explores how to use GPU’s on Anvil. In general we recommend one of two ways:
-
Starting a GPU session on Jupyter Lab (good to help set everything up, debug code, etc)
-
Running batch jobs using the SLURM job scheduler (good when the code is ready and you want to start the training and let Anvil do the rest)
Keep in mind that there is a limited amount of GPU resources available to each group and the Data Mine monitors GPU usage.
| As always, reach out to the Data Mine directly if you have any questions about using GPU’s by sending an email to [email protected]. |
GPU Session using Jupyter Lab
Often it is easiest to develop and do basic testing within Jupyter Lab, then convert the notebook file into a .py script when we are ready to do the full computational run. Here we explore how to do just that.
To begin, login to Anvil: ondemand.anvil.rcac.purdue.edu/pun/sys/dashboard
Select The Data Mine, and select Jupyter Notebook like you usually would to launch Jupyter Lab.
Under "Allocation", select the cis220051-gpu option. Under "Queue", select gpu.
That’s it! Launch the session, and you will be attached to the gpu partition for anything you run in that Jupyter Lab.
Converting My Notebook File (.ipynb) into a Python script (.py)
Unfortunately, this command won’t work directly on Anvil. For now, you will have to download the .ipynb file, install Jupyter locally, and then run this command at your terminal locally. Then, once the file is converted, reupload the .py script to Anvil.
| Be sure to replace the path to your notebook file. |
| We are working on a better solution for this! |
jupyter nbconvert --to python /path/to/notebook.ipynbScheduling GPU batch job with SLURM
Anvil uses SLURM, so when submitting GPU jobs we will be using SLURM. SLURM stands for Simple Linux Utility for Resource Management. It is commonly used in supercomputer and cluster computing environments to efficiently allocate computing resources.
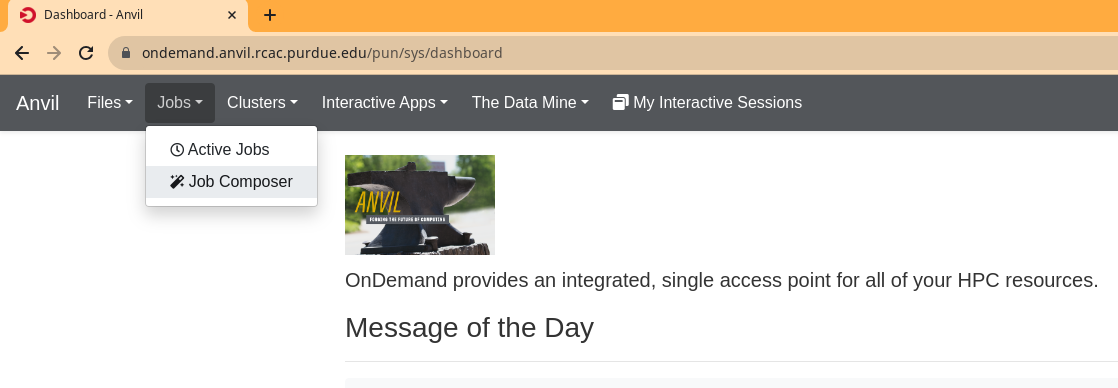
To begin, login to Anvil: ondemand.anvil.rcac.purdue.edu/pun/sys/dashboard
Go to the Job Composer like the image below:
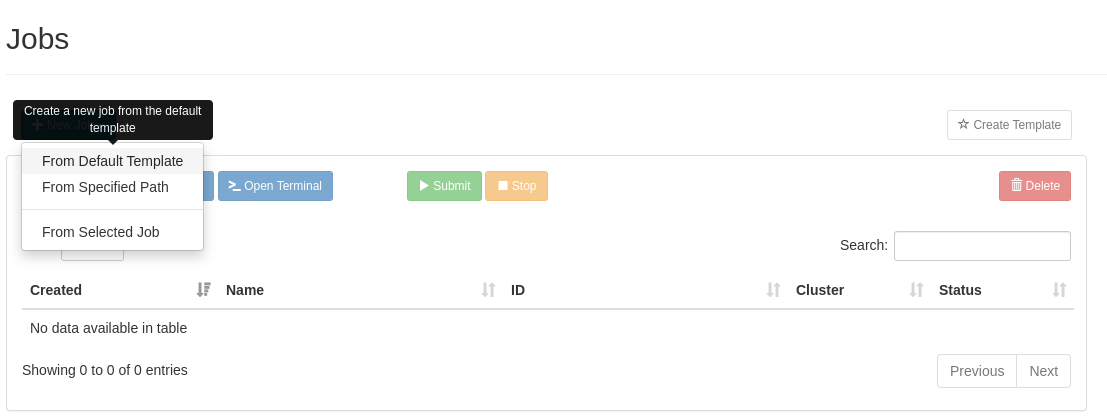
Click New Job, and select Default Template:
| After you’ve made your first job, you can make a new template to copy from by using the Create Template in the middle right of the dialog if you find yourself creaing new jobs often. |
Our SLURM job runs by executing a shell script to start. We need to make sure this shell script is set up correctly to run our code. For this guide, we will set up our shell script to run a simple Python script and verify the output so we know the job was run.
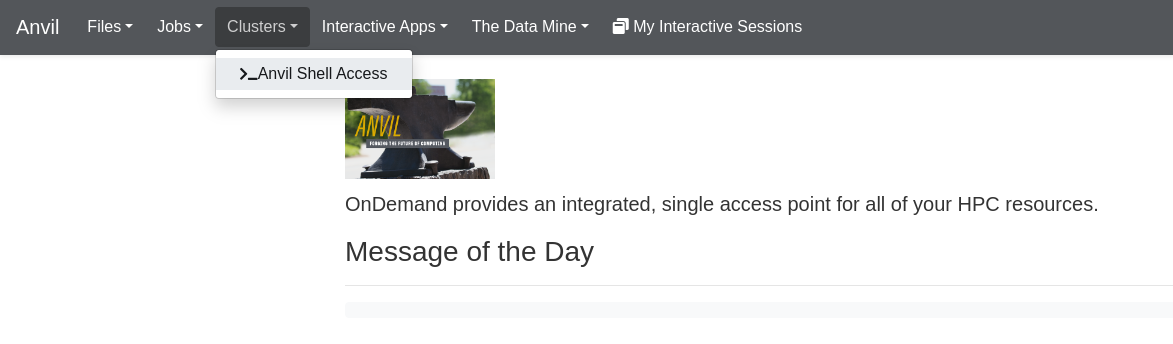
We will come back to the job composer momentarily, so leave it open and open another tab back at the Anvil dashboard and open a terminal at Anvil by clicking here:
Let’s make a new Python file and write to it. Open the file using nano:
nano my_python_job.pyNow paste the code below into the nano prompt. When finished, press Ctrl+O to write to the file, and Ctrl+x to exit the nano prompt.
Be sure to replace myusername with your Access username in the first line.
|
f = open("/home/x-myusername/output.txt", "a")
f.write("Job was run successfully!")
f.close()
Our Python script makes a new file called output.txt and writes the text Job was run successfully! to it. We haven’t run the script yet, so this output.txt file doesn’t exist. When we run our job, it will create the file so we know that it works.
Now head back to the Job Composer. We could’ve made our shell script using nano like we did with the Python script, but Anvil has anot directly.
Input the script below instead of the default template.
Be sure to replace myusername with your Access username in /home/x-myusername/my_python_job.py at the bottom.
|
| Be sure to hit save in the top left corner when done. |
#!/bin/sh -l
# FILENAME:  main_job

#SBATCH --partition=gpu
#SBATCH -A cis220051-gpu
#SBATCH --gres=gpu:1
#SBATCH --ntasks=1
#SBATCH --time=00:02:00

python3 /home/x-myusername/my_python_job.py
You will notice above that we had to tell SLURM to use the gpu partition, and also select our Data Mine GPU allocation (the SBATCH -A cis220051-gpu line). This is how you let SLURM know to use GPU’s, but you could use any partition that was available to you by editing those lines.
|
Back on the Job Composer, we are ready to run our script. Hit the Submit button to start the job. You will notice the status changes to "Queued" as SLURM queues it up. Once its finished, it will say "Completed". Once done, lets go back to the terminal and verify that our job was successful. We can use cat to print out the contents of our output.txt file:
Once again, replace myusername with your Access username.
|
cat /home/x-myusername/output.txtIf your job ran successfully, you should’ve gotten the Job was run successfully! output.
It Works! So Now What?
Now you know how to run your Python script from a job. All you have to do now is make your Python script, and replace the python3 /home/x-myusername/my_python_job.py line with the path to your Python script (that say, trains your model and saves the weights/model). You may also want to increase the time usage, or the number of tasks.
| If you are interested in configuring your job script further, check out the Anvil guide on running batch jobs. |