Setting Up Accounts for The Data Mine
Welcome to The Data Mine! You must follow the steps below to create accounts on the Anvil supercomputer.
Some NOTES before you start:
|
If you were already in The Data Mine in the past, please jump down to Step 2 and send us your ACCESS username again! Thanks! |
|
If you are new to The Data Mine, please start with Step 1. These steps are necessary to create accounts on the Anvil supercomputer. |
Please follow these three steps carefully. If you have trouble at any point, you can jump to the help section at the bottom of this page. We suggest you use the Firefox browser on a laptop or desktop for all steps.
Step 1: Create an ACCESS Account
First, you need to create an ACCESS account. ACCESS is a program funded by the National Science Foundation, to provide a platform for researchers around the country to access supercomputers. It is used by The Data Mine to provide access to the Anvil supercomputer.
-
If you already have an ACCESS account, you do not need to create a new one. You can skip ahead to Step 2: Submit Your ACCESS Account name to Dr Ward.
-
If you think you already have an ACCESS account but forgot your ACCESS username, you can find it here: identity.access-ci.org/username-reminder
To create a new ACCESS account, browse to identity.access-ci.org/new-user-direct
-
Enter your name, and your Purdue email address, and click Submit.
-
You’ll be sent a confirmation code via email, which you’ll enter.
-
Next you will be asked to enter your Home Organization. If you are Purdue student, select Purdue University. If you are a student at another University or a mentor with a corporate partner, select your respective University or company/institution. If you cannot find your organization in the list, you can request that it be added on the same page. The email address you provided above must be associated with the institution you select or later steps to create an Anvil account will fail.
-
You will be asked to review and accept the Acceptable Use Policy.
-
It will look like your account creation is complete, but you must complete the ACCESS User Profile step or we will be unable to create your accounts on the Anvil supercomputer. You can either click the ACCESS User Profile on the page you see after accepting the Acceptable Use Policy, or you can go to allocations.access-ci.org/profile to complete your ACCESS profile. In particular, it is necessary to declare your country where you are studying, i.e., in the United States.
-
You will be asked to re-authenticate your session by logging in again, so we must do a few additional steps before actually completing the profile. You will either see a screen like this, where you will just click AUTHENTICATE WITH CILOGON:
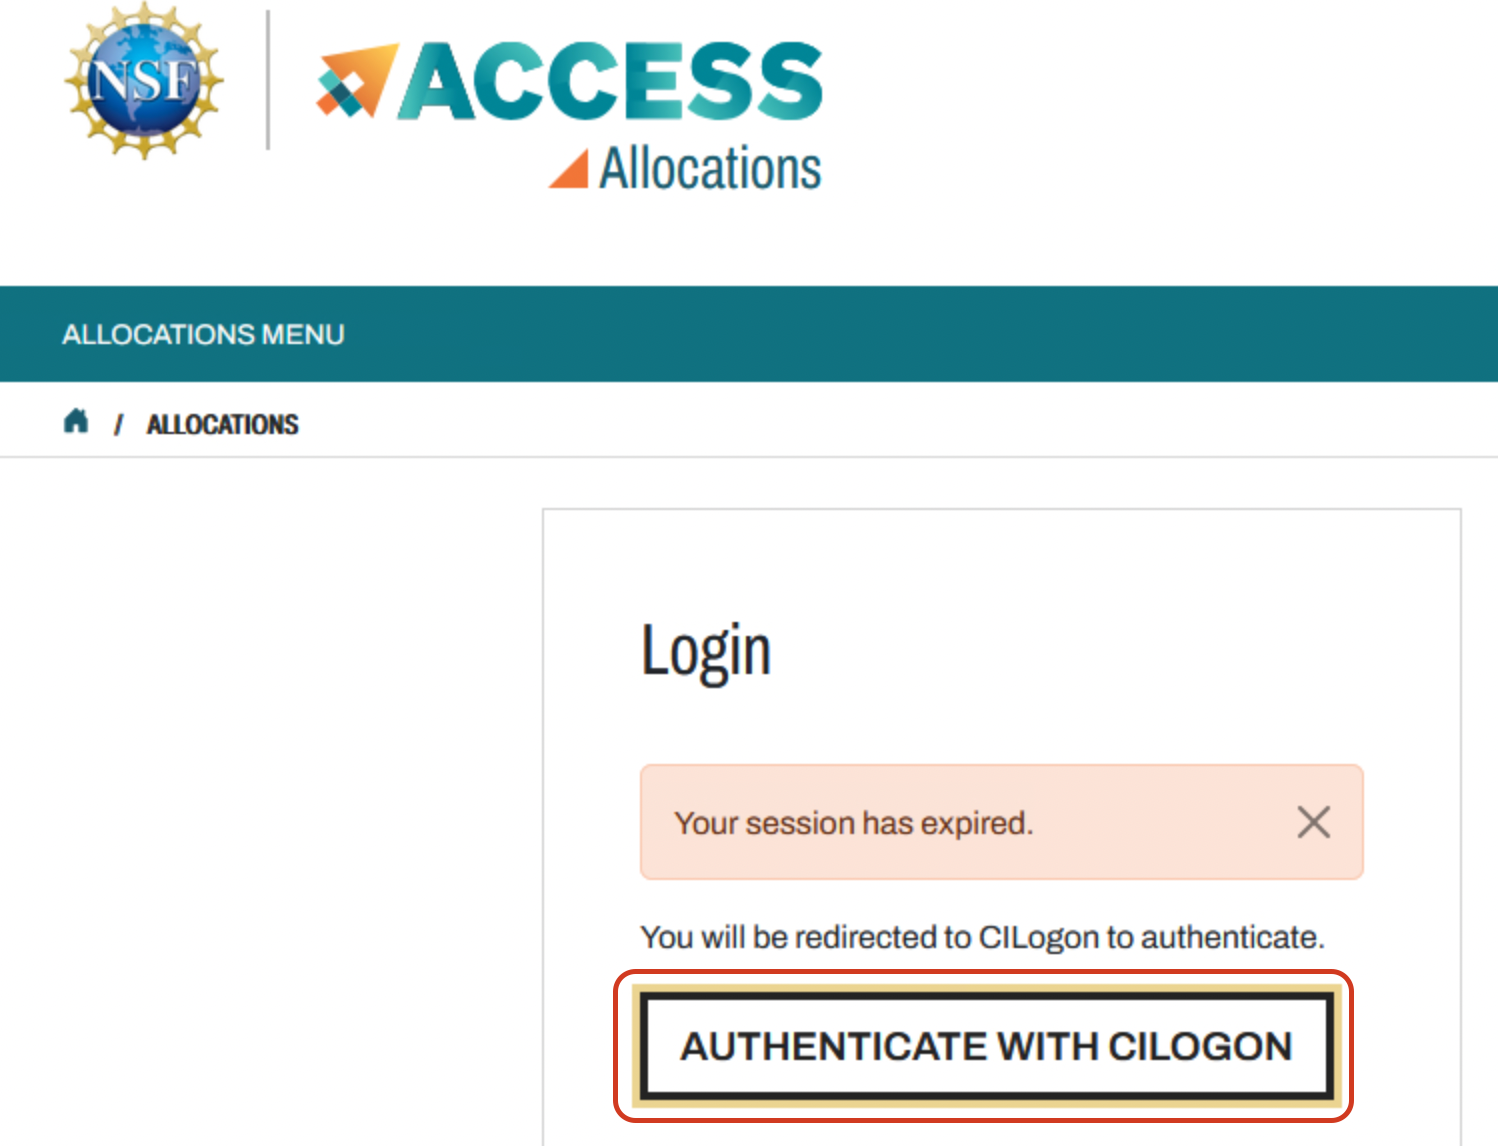 Figure 1. Authenticate with CILOGON
Or you will see a screen like this, prompting you to select an identity provider. You must leave it as the default of ACCESS CI (XSEDE)!
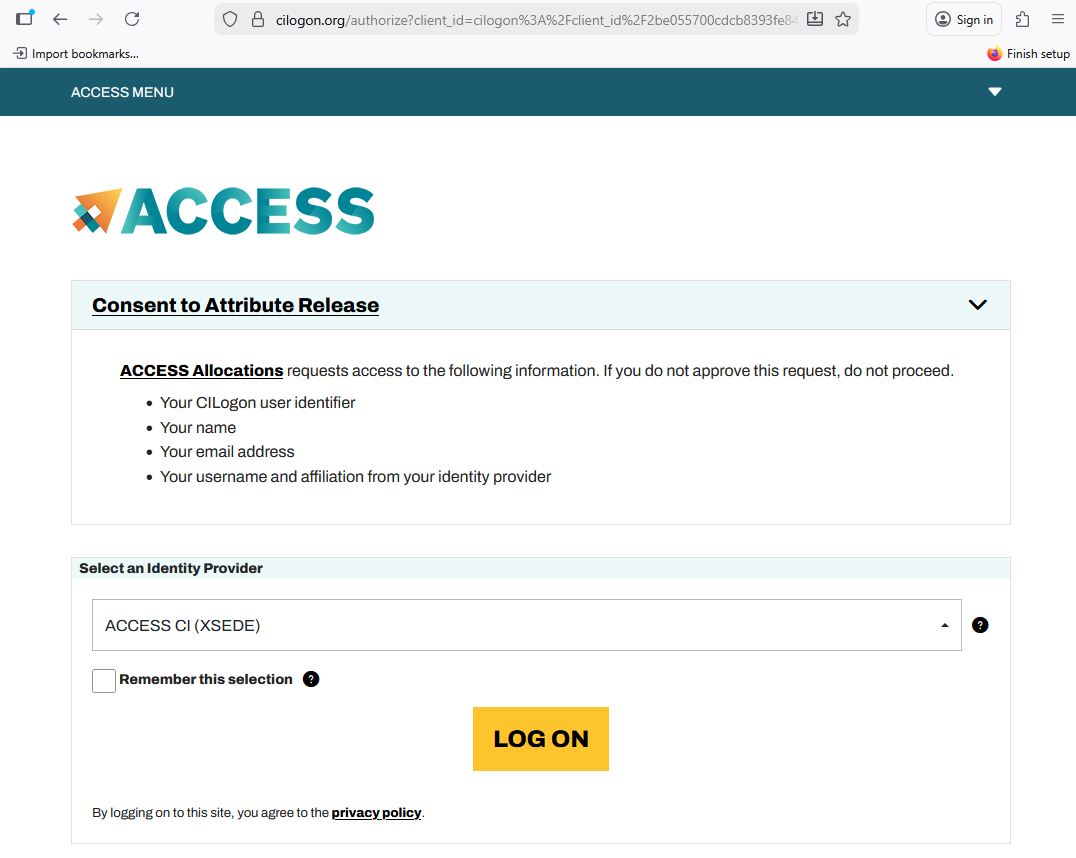 Figure 2. Select Identity Provider
 -
Next you will be asked to enroll in the multi-factor authentication (MFA) system Duo Security which will ask you to install the Duo Mobile app on your smartphone or tablet. Complete the Duo enrollment steps as directed.
-
Now you can complete the ACCESS User Profile. You must fill in all of the required fields marked with a red asterisk. You must click the SAVE PROFILE button for these changes to take effect!
Be sure to record the ACCESS username and password you create. The ACCESS ID should have been sent to you via email from [email protected] with the subject "Your new ACCESS ID".
Step 2: Submit Your ACCESS Account name to Dr Ward
Your ACCESS username is usually different than your Purdue username, so you need to notify Dr Ward about which ACCESS username that you were assigned. Please complete the 3 questions here on Qualtrics, about your name, email, and the ACCESS username that you were assigned:
This Qualtrics survey takes less than 1 minute to complete, because it only has 3 three questions.
Step 3: Log In to Anvil and Start a Server
You will do your work on the Anvil supercomputer through a browser on a desktop or laptop computer. A tablet like an iPad will not work as well. Your computer does not need to be new or powerful. It just needs a modern web browser, preferably Firefox (rather than Chrome, Edge, Safari, etc.). After you have submitted the Qualtrics survey and added your ACCESS username, you need to (please) patiently wait for Dr Ward to register your account.
After he notifies you that your account is ready (which takes a few hours), you can try to log in to Anvil for the first time, by browsing to:
When you log in, you will see "Server Options". Please only choose Datamine Notebook. The other options will not have the right versions of Python, R, and associated packages installed.
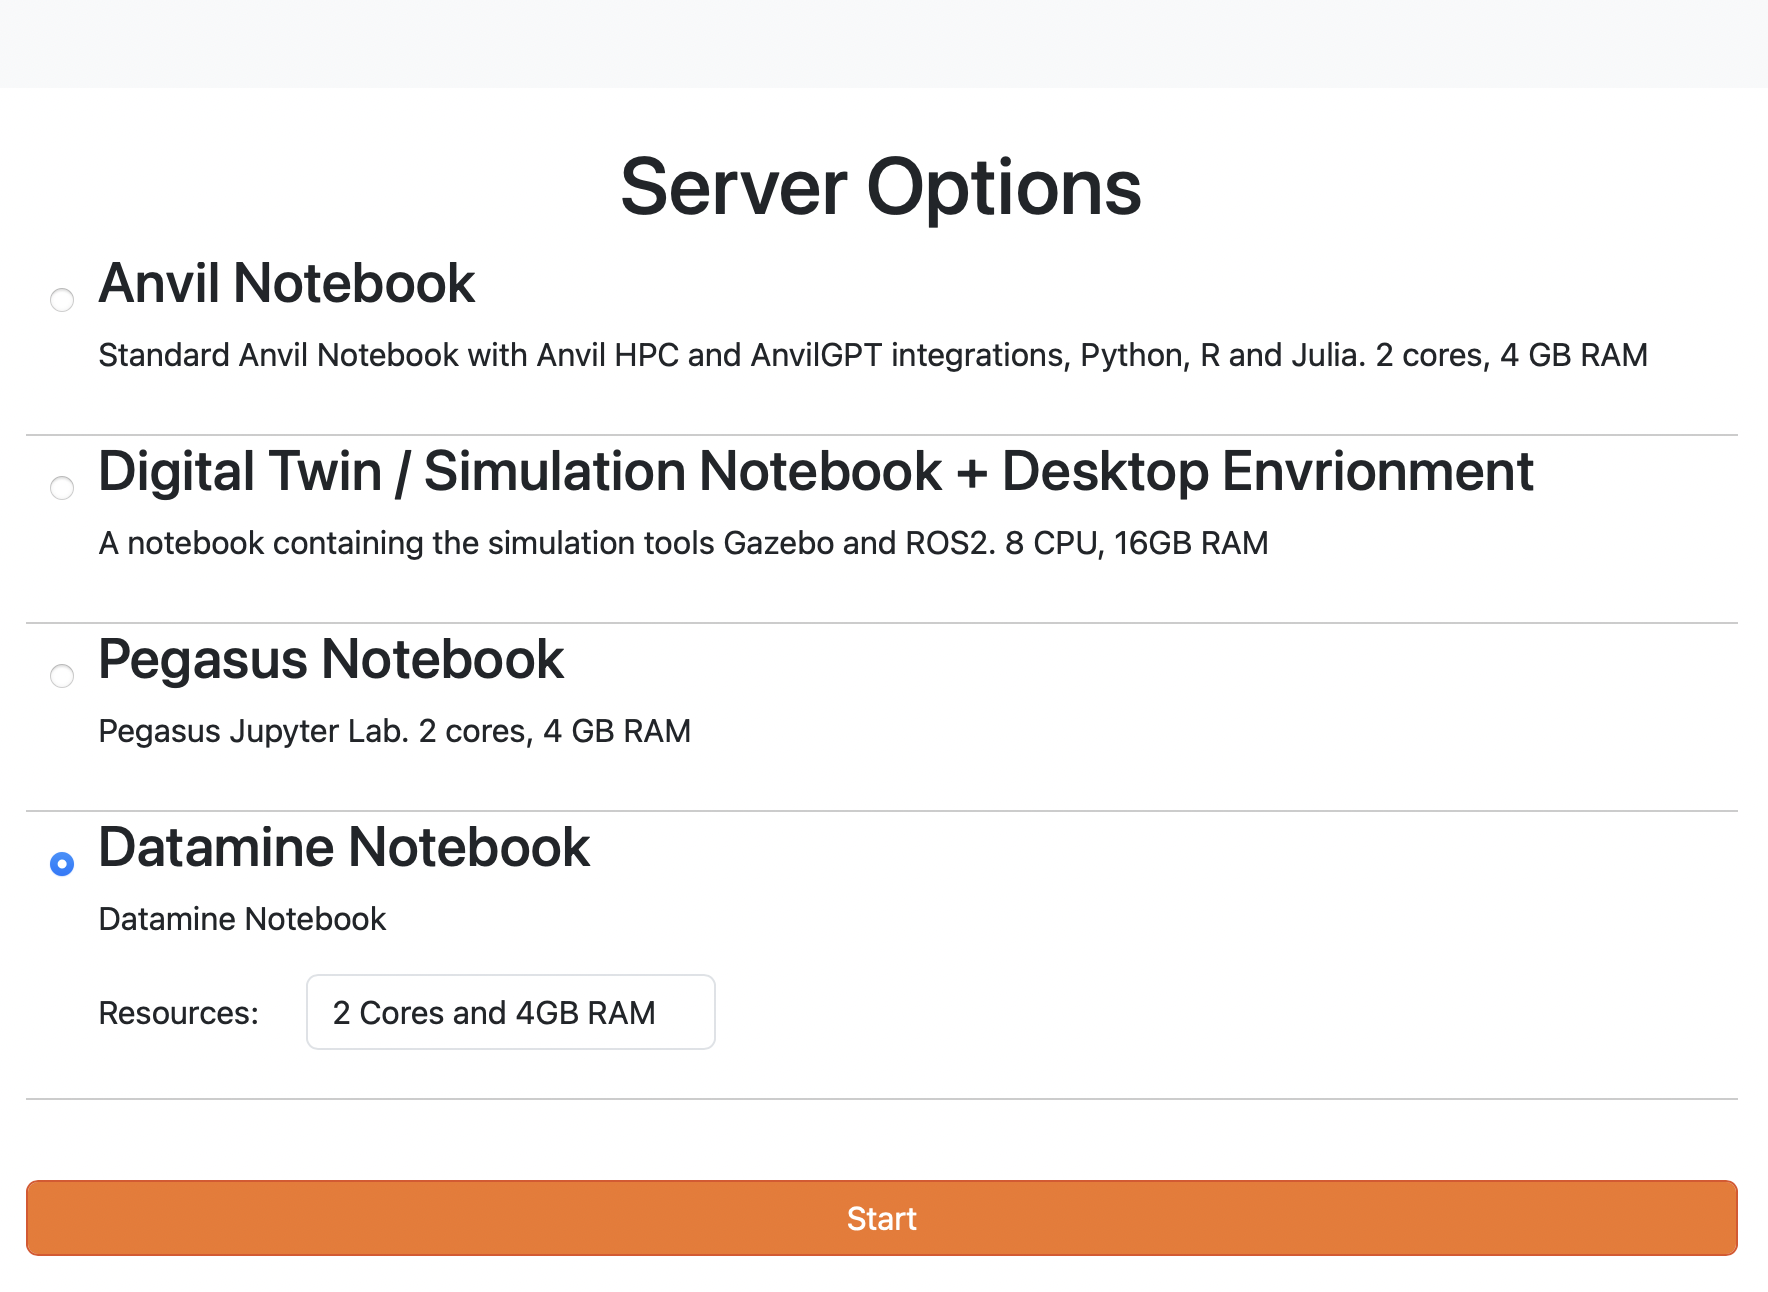
Once you successfully login, you will be in a Jupyter Notebook environment where you can create and run notebooks for your Data Mine work. Unless you are ready to begin creating Jupyter Notebooks, you can simply log out by clicking File→Hub Control Panel→Stop My Server, and then close the browser tab.
Do You Need Help?
If you have problems with any of these steps, we are here to help.
The best way to get help is to write to: [email protected] and provide as much information as possible, including screen shots, if available.
We look forward to working with you this year!
Dr. Ward and The Data Mine Team