How to contribute
Adding content
If you are interested in making a contribution to this book, the first step is to install and configure GitHub Desktop. Then, use the quick-start links provided below.
|
We made an example module to help with any new content. It will be under |
To learn more about how the book is organized, see our organization section. To learn about and see some AsciiDoc examples, see our AsciiDoc section.
Adding an example
This example assumes:
-
the-examples-book repository is located on your local machine at
/Users/myusername/projects/the-examples-book. -
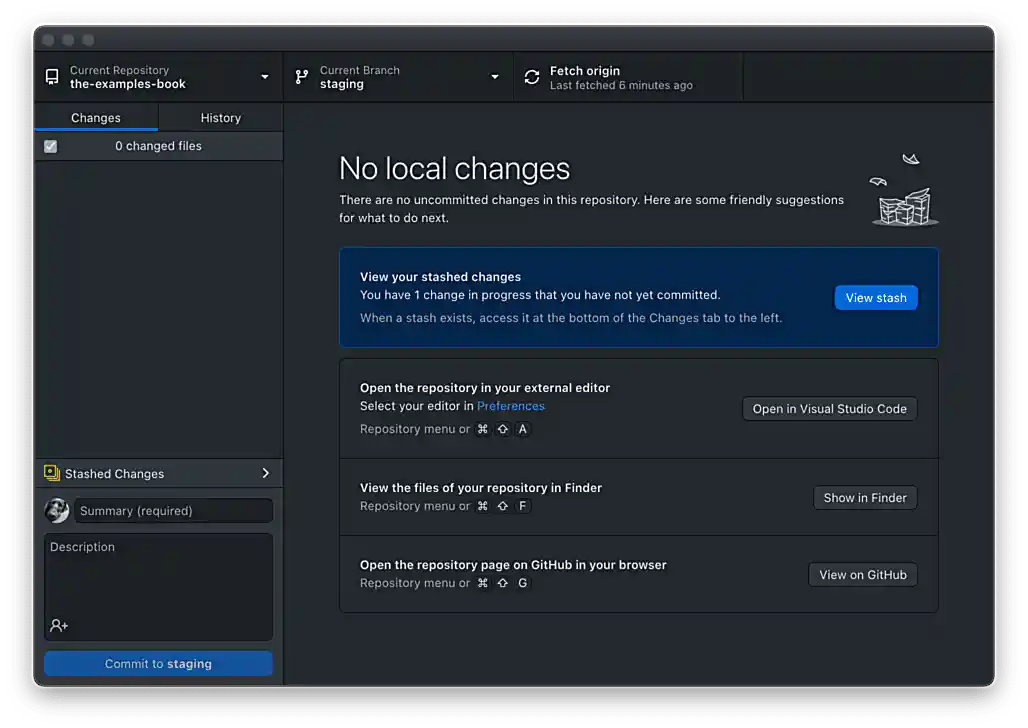
You’ve installed and configured GitHub Desktop, and your Current Repository (in the upper left-hand corner) is set to the-examples-book. Your screen should look similar to the following.
We want to add the following Python example to the Python module.
import pandas as pd

myDF = pd.read_csv("./grades_semi.csv", sep=";")
myDF.head()-
First, create a new branch from the "main" branch describing what you are doing, for example, "add-example-reading-data". To do this, click on the middle tab in GitHub Desktop which will show your current branch. Switch branches to the "main" branch. Once complete, click on the middle tab again, and click the New Branch button.
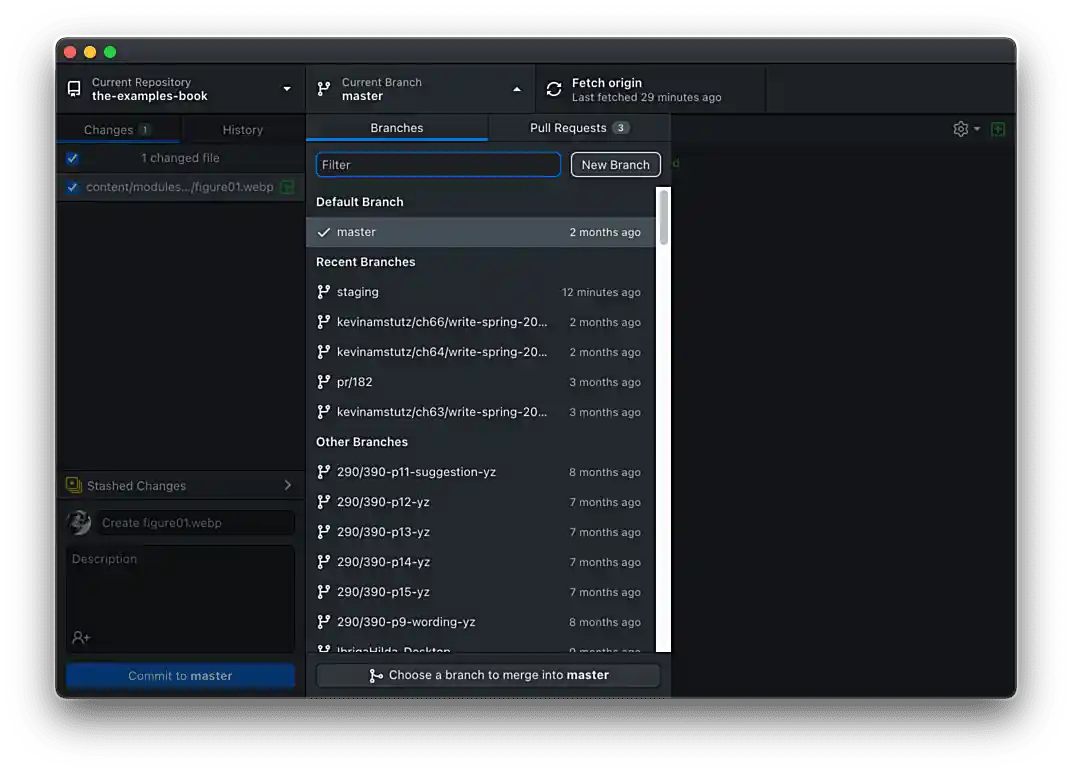 Figure 2. Click the New Branch button
 -
You will be presented with a field and description. Ensure that you are creating a branch from the "main" branch. Enter the new branch name in the text area.
Branch names must be unique, and not already exist. 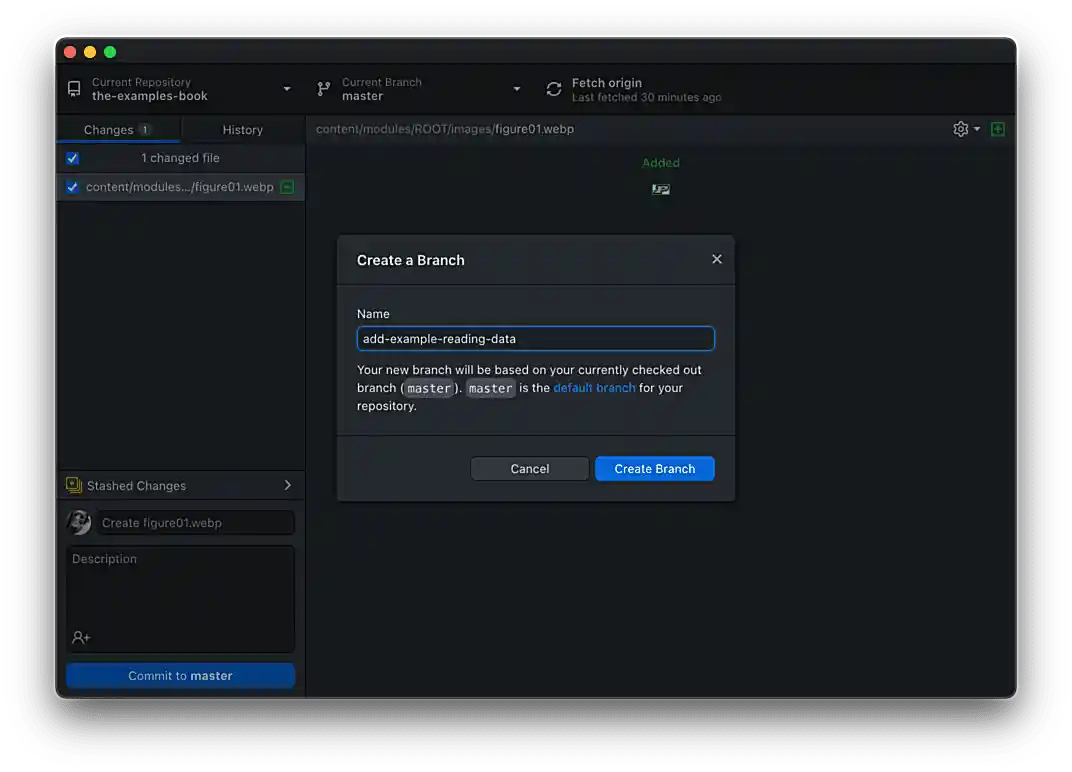 Figure 3. Name and create the new branch
 -
Next, look at the current structure of the book and determine which module the example belongs in. In this case, this is a Python example, and therefore most likely belongs in the Python module.
-
Next, create a new file with the code of the example, and place this file in the examples directory in the python directory. We can see that there is already a
python/examples/example01.pyfile, so let’s call our exampleexample02.py. -
If we have already determined we are just adding an example (vs. a page, or module), it is likely that there is already a page where this example fits appropriately. In this case, this is an example of ready a semi-colon separated file using
pandas. Looking in the Python module, we can see that thepandas-read-write-data.adocpage is where this example belongs. Open the document in your favorite text editor, and add the following content in the Examples section of the page.==== How do I read a csv file called `grades_semi.csv` into a `pandas` DataFrame, where `grades_semi.csv` is semi-colon-separated instead of comma-separated? .Solution ==== [source, python] ---- import pandas as pd myDF = pd.read_csv("./grades_semi.csv", sep=";") myDF.head() ---- ---- grade year 0 100 junior 1 99 sophomore 2 75 sophomore 3 74 sophomore 4 44 senior ---- ==== -
Upon saving the document, you will see that GitHub Desktop shows the added content in our
pandas-read-write-data.adocpage. This addition is staged.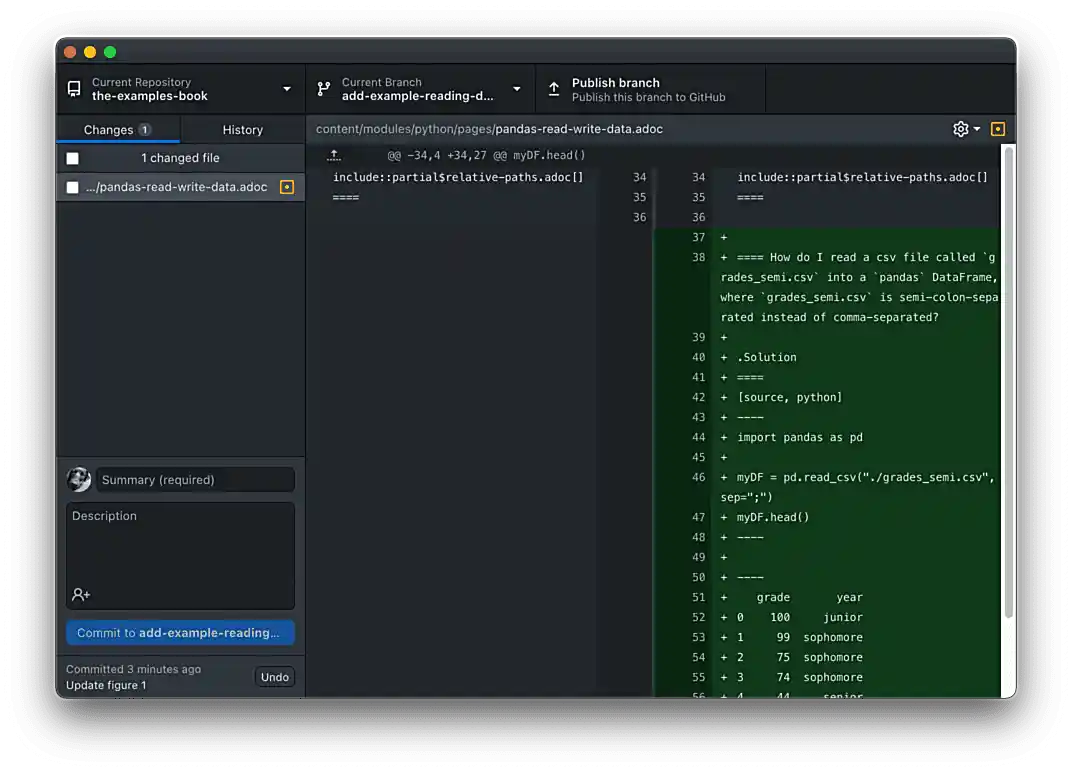 Figure 4. Staged change in GitHub Desktop
 -
The next step is commit the changes. Check the files you’d like to commit in the left-hand section of GitHub Desktop. In the lower left-hand section of GitHub Desktop, create a descriptive commit message, for example, "Add an example reading in semi-colon-separated data in Python". In the larger text area, you can add any other important details.
All text entered in the description section is Markdown friendly — feel free to use bullets or headers. 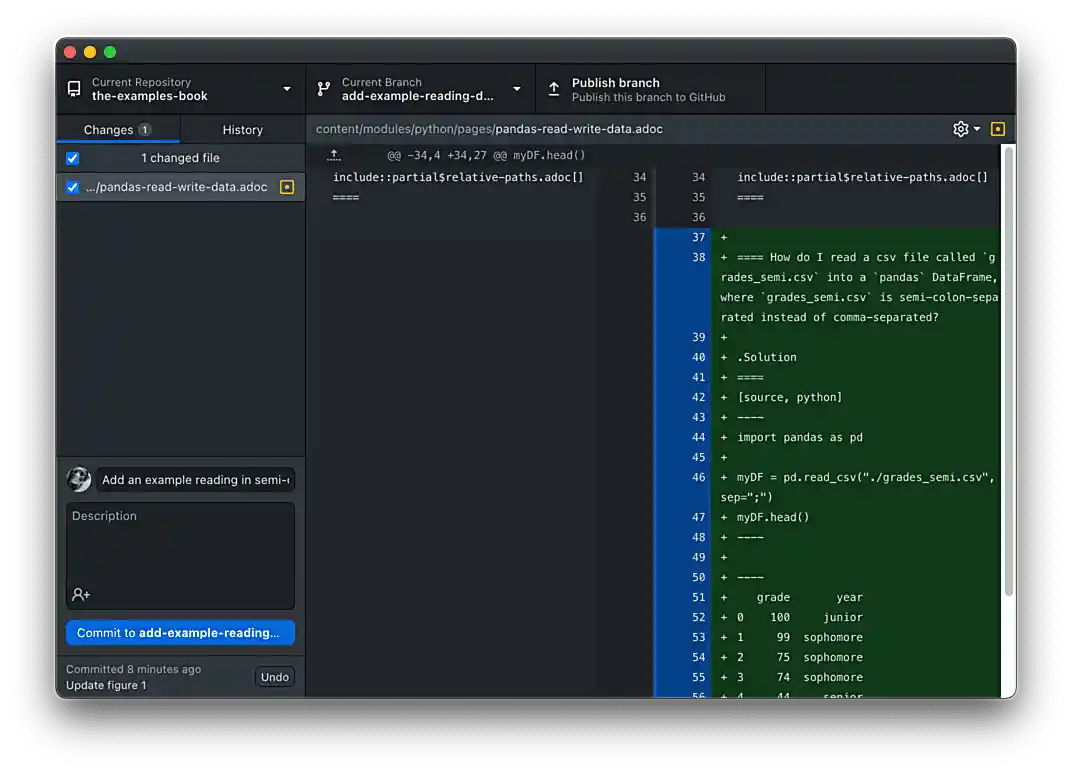 Figure 5. Changes ready to commit
 -
Once the changes are committed, and you are ready to incorporate these changes to the book, the next step is to publish (or push) this branch to our remote repository (hosted on GitHub).
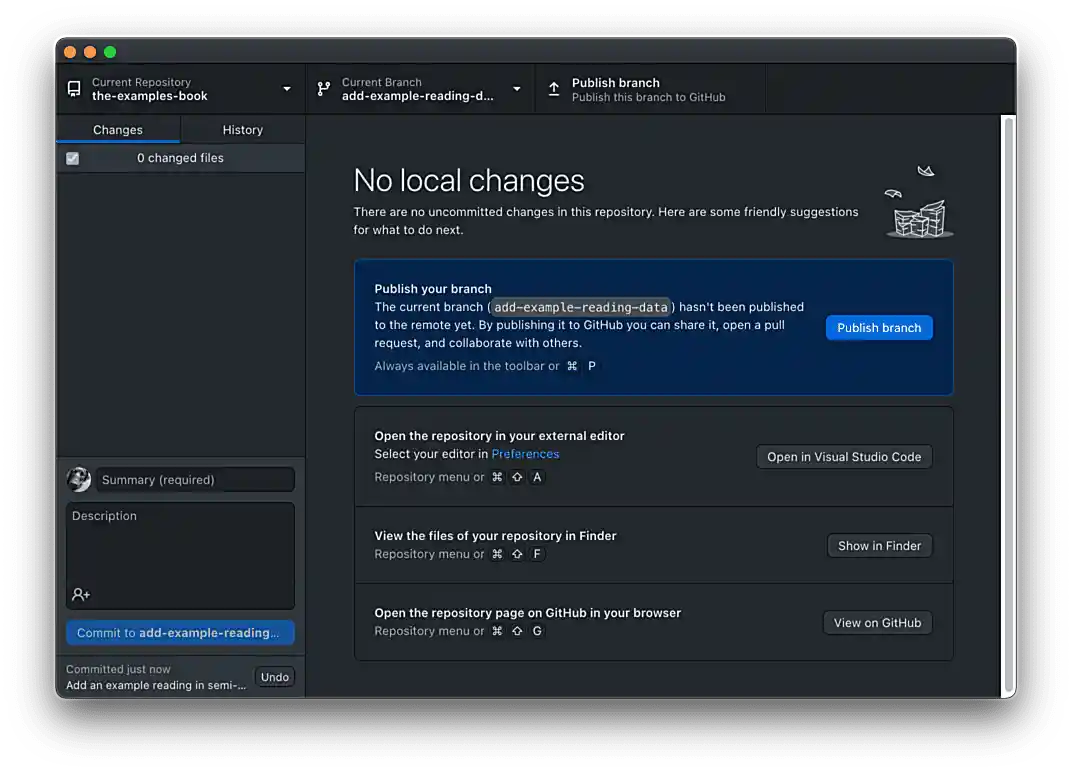 Figure 6. Branch ready to publish
 -
Click Publish branch. You should see a screen indicating the branch is being published.
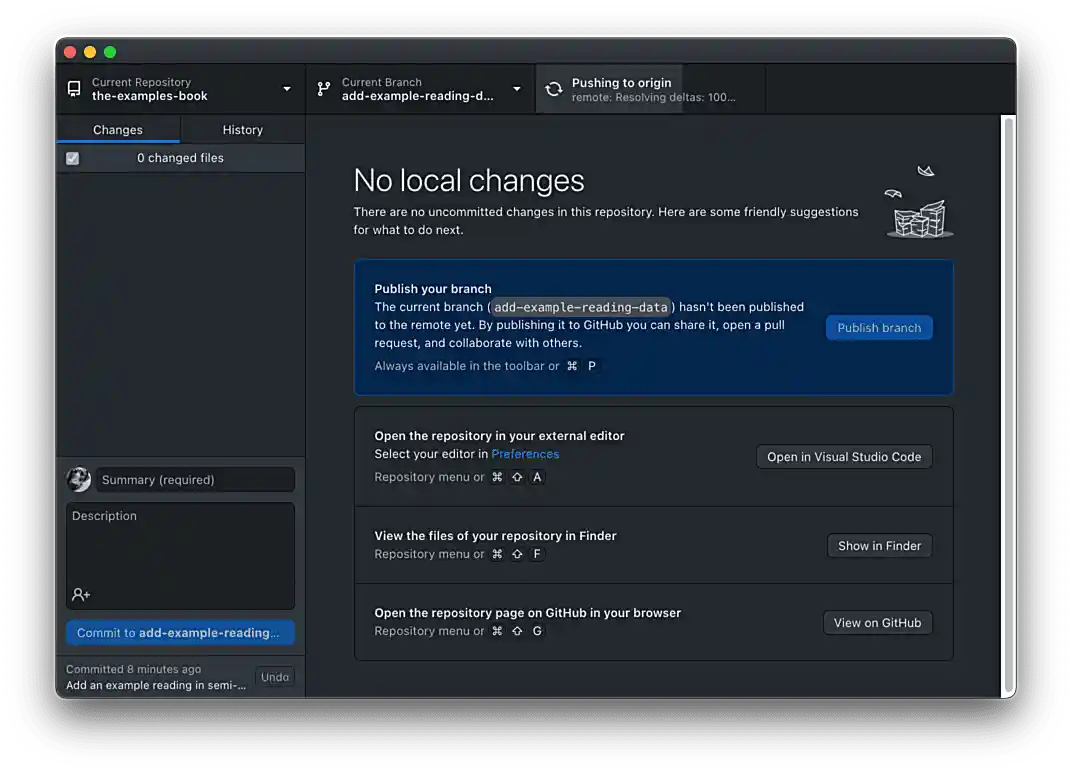 Figure 7. Publishing branch
 -
Once published, your branch will be available to everyone using GitHub. In order to incorporate the changes in this branch to the "main" branch, we must create a pull request or merge request. Click the blue Create Pull Request button.
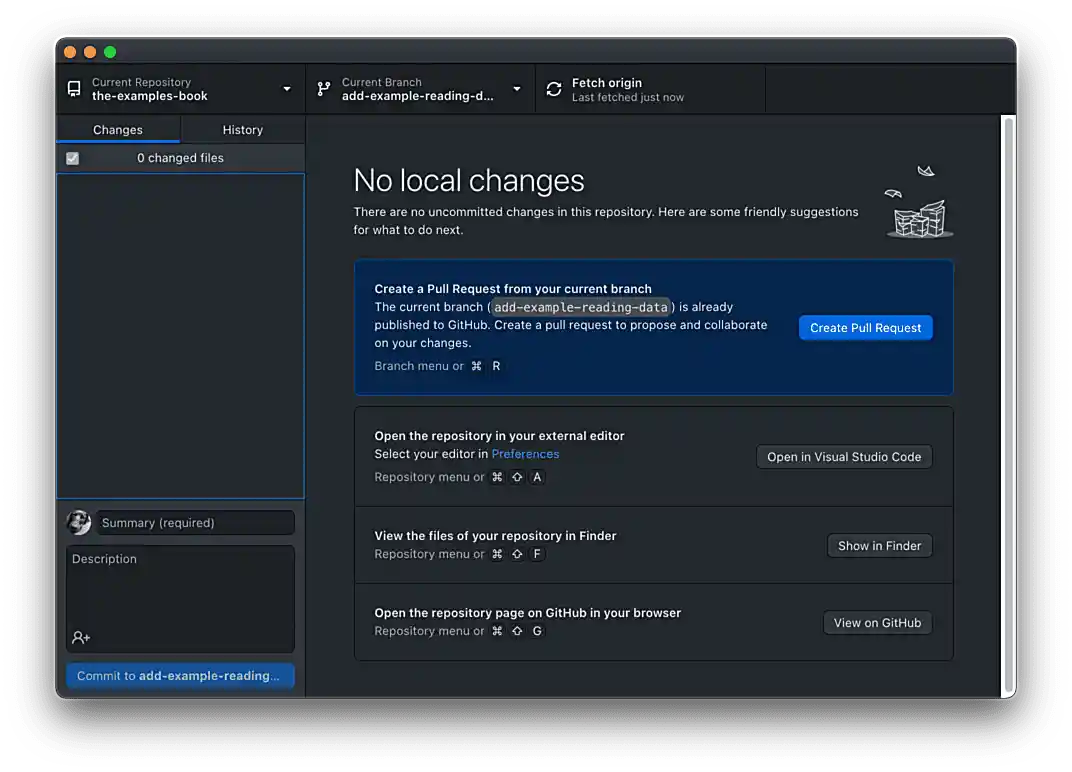 Figure 8. Click Create Pull Request
 -
This will launch you browser and present you with the following screen. On this screen, you can (and should) assign a reviewer (the individual responsible for reviewing the content), designate an assignee (the individual who will actually merge the content), assign a label, and add any further comments.
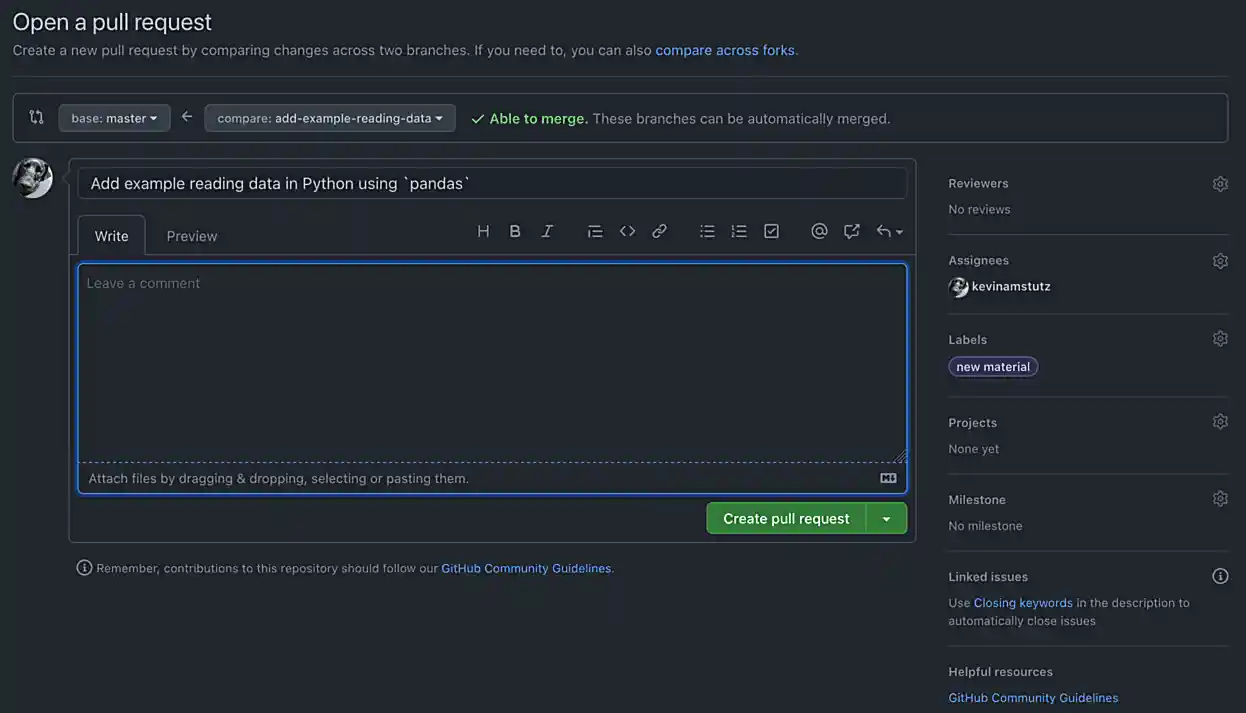 Figure 9. Open pull request
At this stage, you are done. All you need to do is respond to any follow up questions by the assignee or reviewer (which you will get emailed if/when this happens).
In time, your content will be reviewed, and merged. Once merged, it is a matter of waiting ~5 minutes until the book is compiled, deployed, and the search index is updated. Congratulations, and thank you!
Adding a page
This example assumes:
-
the-examples-book repository is located on your local machine at
/Users/myusername/projects/the-examples-book. -
You’ve installed and configured GitHub Desktop, and your Current Repository (in the upper left-hand corner) is set to the-examples-book. Your screen should look similar to the following.
We notice there isn’t any content on pandas DataFrame’s, and we think that info would fit nicely into a separate page.
-
First, create a new branch from the "main" branch describing what you are doing, for example, "add-pd-dataframe-page". To do this, click on the middle tab in GitHub Desktop which will show your current branch. Switch branches to the "main" branch. Once complete, click on the middle tab again, and click the New Branch button.
Figure 11. Click the New Branch button -
You will be presented with a field and description. Ensure that you are creating a branch from the "main" branch. Enter the new branch name in the text area.
Branch names must be unique, and not already exist.
Figure 12. Name and create the new branch -
Next, look at the current structure of the book and determine which module the new page belongs in. In this case, this is a Python specific page, and therefore belongs in the Python module.
-
Next, create a new file in the Python module’s "pages" directory called
pandas-dataframes.adoc. Add the following content to the new page.= DataFrames Some content. == `some_function or method` `some_function or method` description. === Examples ==== Question text === ResourcesThis structure is appropriate for most pages in the book. If you are creating a page that doesn’t fit this format, do your best and changes may be suggested in the review process. -
Make any other additions or changes you’d like to make to the contents of the new page, and save.
-
Open up the module’s
nav.adocfile and add navigation to the new page. In this example, the following would be an appropriate before and after fornav.adoc.Before* xref:index.adoc[Python] ** xref:pandas-intro.adoc[pandas] *** xref:pandas-read-write-data.adoc[Reading & Writing Data]After* xref:index.adoc[Python] ** xref:pandas-intro.adoc[pandas] *** xref:pandas-read-write-data.adoc[Reading & Writing Data] *** xref:pandas-dataframes.adoc[DataFrames]You can nest pages however you’d like — although it is best to keep it well organized. You can read more about navigation using Antora here. -
Upon saving the document, you will see that GitHub Desktop shows the added content in our
pandas-read-write-data.adocpage. This addition is staged.
Figure 13. Staged change in GitHub Desktop -
The next step is commit the changes. Check the files you’d like to commit in the left-hand section of GitHub Desktop. In the lower left-hand section of GitHub Desktop, create a descriptive commit message, for example, "Add a page that covers
pandasDataFrame’s". In the larger text area, you can add any other important details.All text entered in the description section is Markdown friendly — feel free to use bullets or headers.
Figure 14. Changes ready to commit -
Once the changes are committed, and you are ready to incorporate these changes to the book, the next step is to publish (or push) this branch to our remote repository (hosted on GitHub).
Figure 15. Branch ready to publish -
Click Publish branch. You should see a screen indicating the branch is being published.
Figure 16. Publishing branch -
Once published, your branch will be available to everyone using GitHub. In order to incorporate the changes in this branch to the "main" branch, we must create a pull request or merge request. Click the blue Create Pull Request button.
Figure 17. Click Create Pull Request -
This will launch you browser and present you with the following screen. On this screen, you can (and should) assign a reviewer (the individual responsible for reviewing the content), designate an assignee (the individual who will actually merge the content), assign a label, and add any further comments.
Figure 18. Open pull requestAt this stage, you are done. All you need to do is respond to any follow up questions by the assignee or reviewer (which you will get emailed if/when this happens).
In time, your content will be reviewed, and merged. Once merged, it is a matter of waiting ~5 minutes until the book is compiled, deployed, and the search index is updated. Congratulations, and thank you!
Adding an appendix
What we are referring to as an "appendix", Antora calls a "component". If a particular topic is largely outside of the scope of The Data Mine curriculum for most students, it may belong in an appendix instead. Adding an appendix to the book is straightforward.
-
Create a new repository (public) with the following, minimal structure. Alternatively, you can copy the following files/directories from an existing appendix repository and copy into your new one: .github, .gitignore, content (directory), readme.md.
my_repo2 └── content ├── antora.yml └── modules └── ROOT ├── nav.adoc └── pages 4 directories, 2 files -
Fill in the content of the
antora.ymlconfiguration file. The following is an example of a minimalantora.ymlfile.name: example-appendix title: Example Appendix version: master display_version: stable start_page: ROOT:index.adoc nav: - modules/ROOT/nav.adocChoose the namecarefully. Thenameends up appearing as the first value in the URL’s path and should have no spaces. For example: https://the-examples-book.com/example-appendix/<version>/<page-name>. -
Create and place the desired AsciiDoc content in the
pagesdirectory. The index.adoc page will be the landing page for your appendix. For new high level pages, add lines to the nav.adoc file. If you do create further navigation in nav.adoc, you can then create new .adoc files with the corresponding name in thepagesdirectory. Make sure to follow our page naming convention. -
When you are satisfied with the results, modify the
antora-playbook.ymlfile in our primary repository, and create a Pull Request. This is as simple as adding another item to our section of the.ymlfile. For example:- url: https://github.com/my_organization/my_appendix_repo branches: main start_paths: contentIn the primary repository you will also need to change the
index.adocfile add a link on the homepage to your appendix. For example:* xref:example-appendix:ROOT:index.adoc[Example Appendix]When you are done making updates make sure to push all changes in both your new repository and the primary Examples Book repository. All content incorporated into this book will be indexed and added to the search functionality by the maintainer.
Check out this book’s antora-playbook.ymlfile for more details.
Designing for accessibility
Accessibility in website and content design is a vital aspect that is often overlooked. When adding new content to The Examples Book it is recommended that you follow as many of the accessibility guidelines below as possible. In addition, the Data Mine staff is continuing to learn about how we can make the examples book more accessible. If you have any suggestions, please email us at [email protected].
It’s also important for us to note that we are not experts in accessibility. Our tips are based on the sources below, but the list is not exhaustive by any means. In our limited experience we recommend thinking through the different ways that people may access the site and attempting to design for as many of those ways as possible.
High-level Checklist for Web and Content Design
-
Is the site consistent in design (headings, lists, hierarchies)?
-
Is special text, such as code or quotes, easy to identify and understand?
-
Does the text avoid abbreviations and clearly explain topic specific terms or phrases.
-
Do videos have captions, dictations, or other alternative communication methods?
-
Do images have alternative text?
-
If the images contain important information are there other methods for gaining the information?
-
Are visualizations designed for easy understanding and clear readability?
-
Are the visualizations designed for color blind individuals?
Organization
This book is organized into the core book, and supplementary appendices.
The core book contains content we hope every student learns. For example, an code snippet showing how to read and write data to a file using Python, would most likely get added somewhere in the core book.
Supplementary appendices are reserved for topics that are largely beyond the scope of The Data Mine curriculum for most students. In certain cases, a corporate partner’s team may be required to quickly learn about a topic. For example, perhaps a team is working on an app to translate natural language to an SQL query. In this scenario, a mentor may ask students to take a look at content in the NLP appendix. Before creating a Pull Request to add content, please take a moment to figure out where that content most appropriately fits. When in doubt, please feel free to ask!
Within the core book or an appendix, you will find a certain file structure.
my_repo
└── content (1)
    ├── antora.yml (2)
    └── modules (3)
        ├── ROOT (4)
        │   ├── attachments (5)
        │   │   └── example-project.zip
        │   ├── examples (6)
        │   │   ├── example01.py
        │   │   ├── example02.R
        │   │   └── example03.sh
        │   ├── images (7)
        │   │   ├── figure01.png
        │   │   └── figure02.png
        │   ├── nav.adoc (10)
        │   ├── pages (8)
        │   │   ├── getting-started.adoc
        │   │   └── storing-data.adoc
        │   └── partials (9)
        │       └── warning.adoc
        ├── module1 (11)
        │   ├── attachments
        │   ├── examples
        │   ├── images
        │   ├── nav.adoc
        │   ├── pages
        │   └── partials
        └── module2
            ├── attachments
            ├── examples
            ├── images
            ├── nav.adoc
            ├── pages
            └── partials

20 directories, 13 files
The file structure is important. Special keywords in the provided example that should not be modified are:
| 1 | content |
| 2 | antora.yml |
| 3 | modules |
| 4 | ROOT |
| 5 | attachments |
| 6 | examples |
| 7 | images |
| 8 | pages |
| 9 | partials |
| 10 | nav.adoc |
While not specifically highlighted in the provided example, the attachments, examples, images, pages, and partials folders are examples of repeated keywords, or keywords that are reused in each module. While nav.adoc is not technically a special keyword, we would like to keep this consistent with all modules and appendices added to the book.
|
In addition, in the core book repository, you will find a file called antora-playbook.yml in the root of the repository. This file is responsible for pulling in all of the resources for the core book and all of the dependencies.
| This book uses Antora to render the online book. The following is a summary of information that can be found online. For a more in-depth look at Antora, please see the official documentation. |
- content
-
This is a directory at the root-level of the repository which should contain the
antora.ymlfile and amodulesdirectory. - antora.yml
-
This is a configuration file that contains information about the book or appendix contained within the sibling
modulesdirectory. At the time of writing, this is what the core book’santora.ymlfile looked like.name: book (1) title: The Examples Book (2) version: 0.1.0 (3) start_page: ROOT:index.adoc (4) nav: - modules/ROOT/nav.adoc (5) - modules/scholar/nav.adoc - modules/unix/nav.adoc - modules/SQL/nav.adoc - modules/r/nav.adoc - modules/python/nav.adoc - modules/FAQs/nav.adoc - modules/projects/nav.adoc - modules/corporate_partners/nav.adoc - modules/geospatial/nav.adoc - modules/contributors/nav.adoc1 This is the name of the core book or appendix. This appears as the first value in our URL’s path. For example: https://the-examples-book.com/book/<version>/<page-name>. 2 The title of the core book or appendix. This typically appears to the right of the favicon in the browser tab. 3 The version of the core book or appendix. This appears as the second value in our URL’s path. For example: https://the-examples-book.com/book/0.1.0/<page-name>. 4 The location of the "home" page for the core book or appendix. Where do we want Antora to start? Note: If we want Antora to start at ROOT:index.adocthen we can remove this line altogether, because this is the default.5 A list of nav.adocfiles. These files contain a list of anchor links to that appear in the left-hand menu. For example, at the time of writing this,modules/ROOT/nav.adoclooked like this.* xref:index.adoc[Introduction] * xref:how-to-contribute.adoc[How to contribute] - modules
-
The directory containing (at a minimum) the
ROOTmodule, and any other custom-named modules you would like. In our example we also had amodule1module and amodule2module. - ROOT
-
The
ROOTmodule. This is the default, required module. No further modules are required. An appendix or core book may not need more than theROOTmodule. In fact, our scholar appendix only contains theROOTmodule. - attachments
-
A "family directory" that should be used to store binaries or other large files. These attachments can then be referenced internally. See here.
- examples
-
A "family directory" that should be used to store examples. For this book, examples will most likely be code snippets. In practice, any potentially reuseable code snippet should be added to the
examplesdirectory. This enables maintainers to update a code snippet once, and have it applied everywhere it appears in the book. These examples can be referenced internally, and included in a code chunk. See here. - images
-
A "family directory" that should be used to store all figures and images. For this book, we will require all images to be labeled
figureXXXwhereXXXis a number starting at001and ending at999. These images can be referenced internally. See here. - pages
-
A "family directory" that should be used to store each page of the book. These are AsciiDoc files. This is where the actual content lives.
|
In this book, each |
- partials
-
A "family directory" that should be used to store content snippets. Provided examples include common descriptions, terminology, or referenced tables. Any content that doesn’t fit into a previously named "family directory", but will most likely be reused in multiple pages should be added as a partial to the
partialsdirectory. Partials can be referenced internally. See here. - nav.adoc
-
This folder contains a list of anchor links that end up as your navigation links in the menu on the left hand side of the book. For example, at the time of writing this,
modules/ROOT/nav.adoclooked like this.* xref:index.adoc[Introduction] * xref:how-to-contribute.adoc[How to contribute]
AsciiDoc
This book is written using AsciiDoc. AsciiDoc is an open and powerful format for writing notes, text documents, books, etc. It is easy to write technical documentation in AsciiDoc, and quickly convert the text to various mediums like websites, ebooks, pdfs, etc.
Below are a variety of AsciiDoc examples from powerman. To see how content is rendered, compare the adoc file for this page, to it’s output below.
Level 1
Text.
Paragraphs
Usual paragraph.
Literal paragraph.
	Must be indented
list = ['first', 'second', 'third',]Not code in the next paragraph.
|
Optional Title
This is an example of a single-paragraph note.
|
| This is a tip. |
| This is important. |
| This is a caution note. |
| This is a warning. |
Blocks
*Listing* Block

Use for code of file listings
import pandas as pd

myDF = pd.read_csv("myFile.csv")
Alternatively, you can also insert the content of source code files in a modules examples directory:
## include::../examples/example01.py[]Example Block
Use for examples
The default caption "Example:" can be changed using [caption="Custom: "] before the example block.
|
Optional Title
Note Block Use for multi-paragraph notes. |
Use for backend specific markup like:
| 1 | 2 |
*Literal* Block

Use when literal paragraph (indented) like
	1. First
	2. Second

is incorrectly processed as list.
Quote Block
Use to cite somebody.
cite source
Text
forced
line break
bold text
italic text
monospaced text
highlighted text
‘double quoted’
“single quoted”
textsuper
textsub
A command: echo "some command"
monospaced and *bold*
passthrough bold
Special symbols: © ® ™ — … → ← ⇒ ⇐ 
Escape characters: _italic_, _italic_, t__e__st, t__e__st, bold, <b>normal</b>, ¶, \`not single quoted', \``not double quoted''
Images
|
We want to keep this site fast. The following are best practices for adding images to this book.
|

Lists
-
Unordered list
-
Another item
-
Another item
Some important note really quick. -
Back to the list
-
Ordered list
-
Another item
-
Another item
Some important note really quick. -
Back to the list
- First
-
First item in description list.
- Second
-
Second item in description list.
-
Checked item 1
-
Checked item 2
-
Unchecked item
-
-
LaTeX
We use MathJax to render LaTeX. Our current configurations allow inline equations using \$'s and display equations using \$\$'s. To escape a regular \$, you can prepend a \, so, for example, to write \$2.00 you would type \$2.00.
This is an example of an inline equation: $e=mc^2$
We’ve configured MathJax to not process text in the following tags: <script>, <noscript>, <style>, <textarea>, <pre>, <annotation>, <annotation-xml>, and <code>.
Optimize images
We want to keep this book as fast to load as possible. The following are our suggestions to optimize images prior to adding them to this book.
magick convert input.png -filter Gaussian -sharpen 0x3 -resize 700x500 output.pngpngquant 64 --skip-if-larger --strip --ext=.png --force output.pngzopflipng -y output.png output.pngcwebp -q 30 output.png -o output.webpYou can read more about some of these optimizations in this excellent GitLab blog post.
Automator
If you are working on an Apple machine, you can setup Automator to automatically convert all `.png’s as they are added to the repository.
-
Open Automator.app, and select Folder Action, then click Choose.
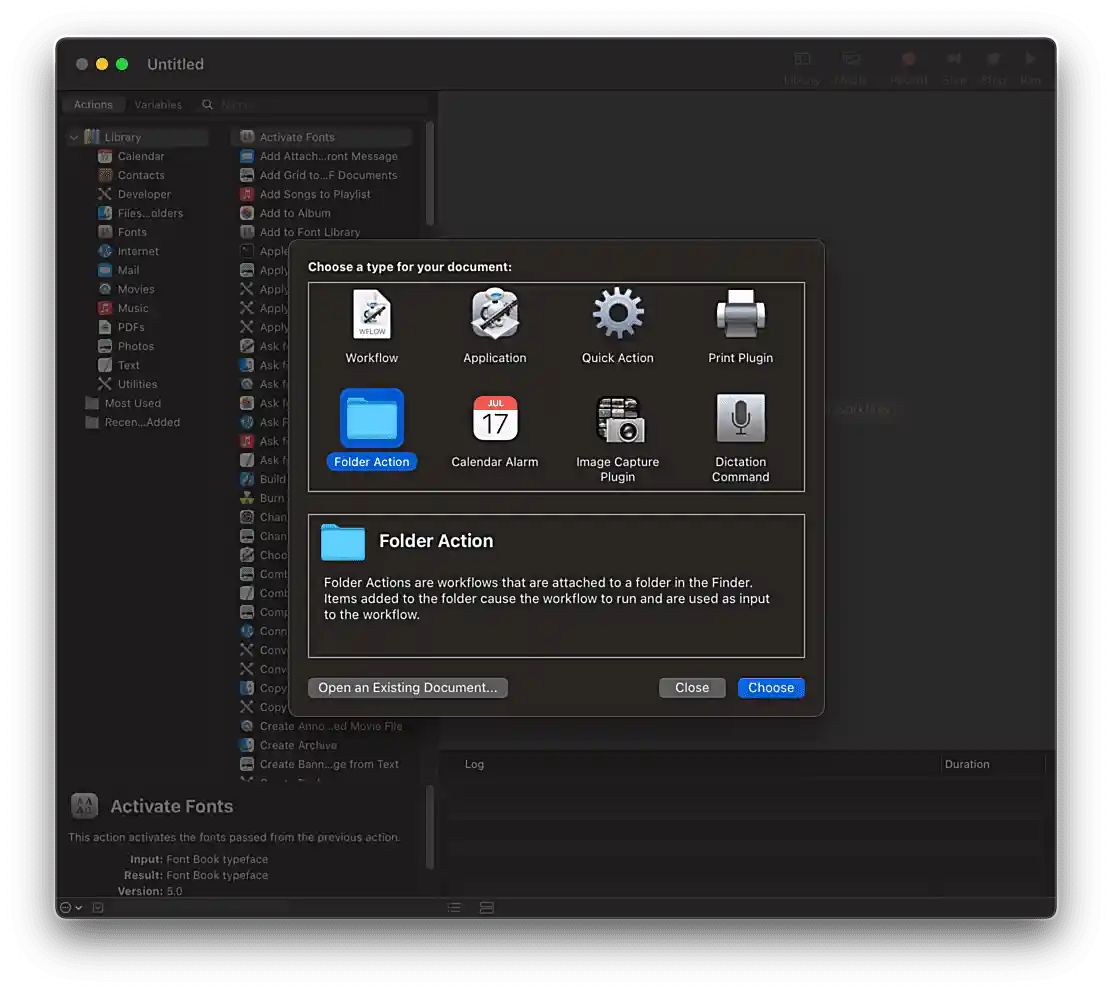 Figure 19. Automator menu
 -
At the top of the screen choose folder where your the-examples-book repository lives. Drag and drop Run Shell Script from the left-hand menu.
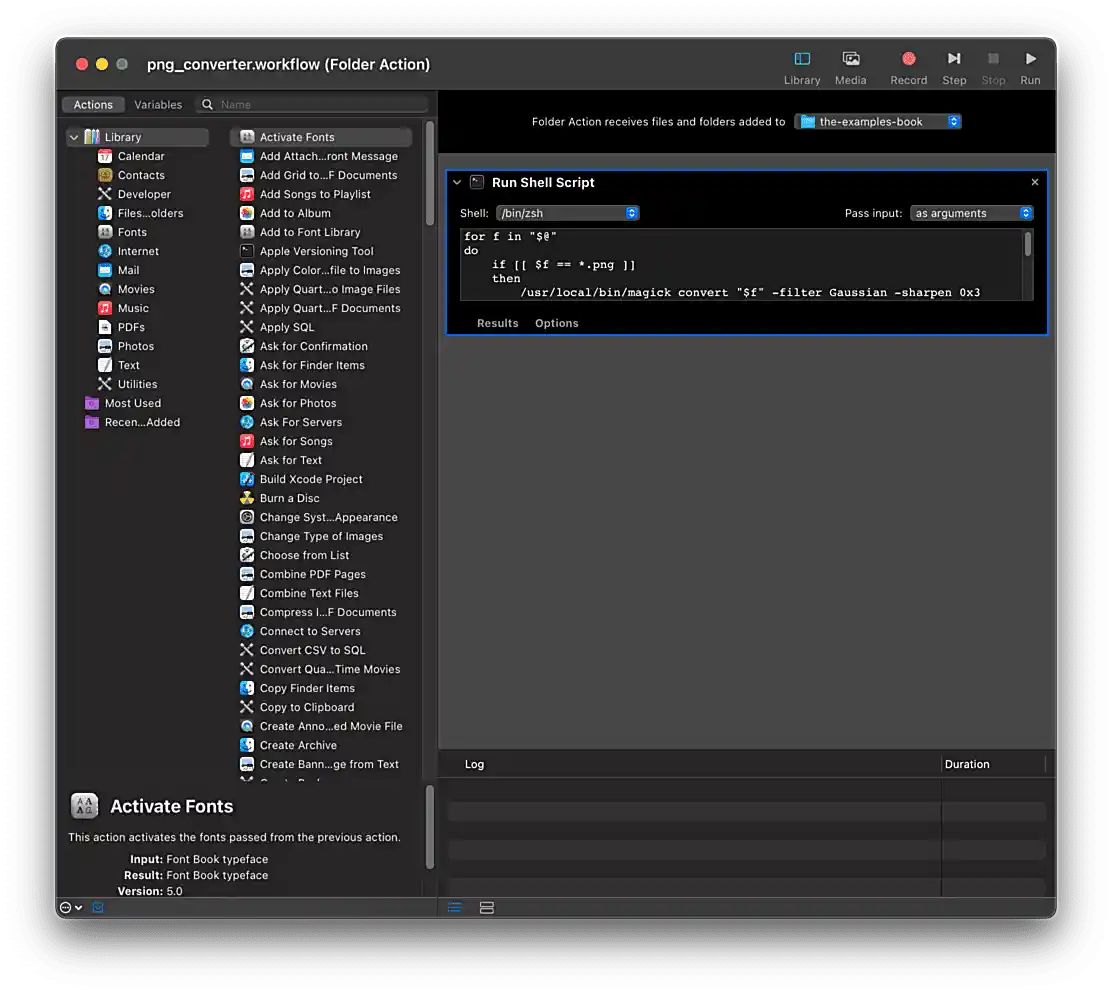 Figure 20. Folder action setup
 -
Change Pass input to as arguments, and add the following script to the code block.
for f in "$@" do if [[ $f == *.png ]] then /usr/local/bin/magick convert "$f" -filter Gaussian -sharpen 0x3 -resize 50% "$f" /usr/local/bin/pngquant 64 --skip-if-larger --strip --ext=.png --force "$f" /usr/local/bin/zopflipng -y "$f" "$f" /usr/local/bin/cwebp -q 30 "$f" -o "${f%.*}.webp" rm "$f" fi done -
Open finder and navigate to each "images" folders which you’d like automator to watch, and automatically convert and optimize
.pngfiles. This can be easily done by holding Ctrl+Click on the directory and attaching the workflow to each folder.
|
This is experimental. If you have a better way to do this, please feel free to contribute. |